User Guide
Now that we understand a bit better what the Livepeer platform is and how it complements MistServer with transcoding abilities, let's see how we combine Livepeer transcoding with MistServer:
Have MistServer 3.0 (or later) running Your Livepeer API key - see www.livepeer.com/register
First we'll need to make sure we have an Livepeer API key. We will set up Livepeer in MistServer. We will check and verify the result.
All Livepeer Video Service accounts get access to a unique API key, for free. This will provide 1,000 transcoding minutes per month and should be enough to get you started! Get access to yours by signing up at www.livepeer.com/register
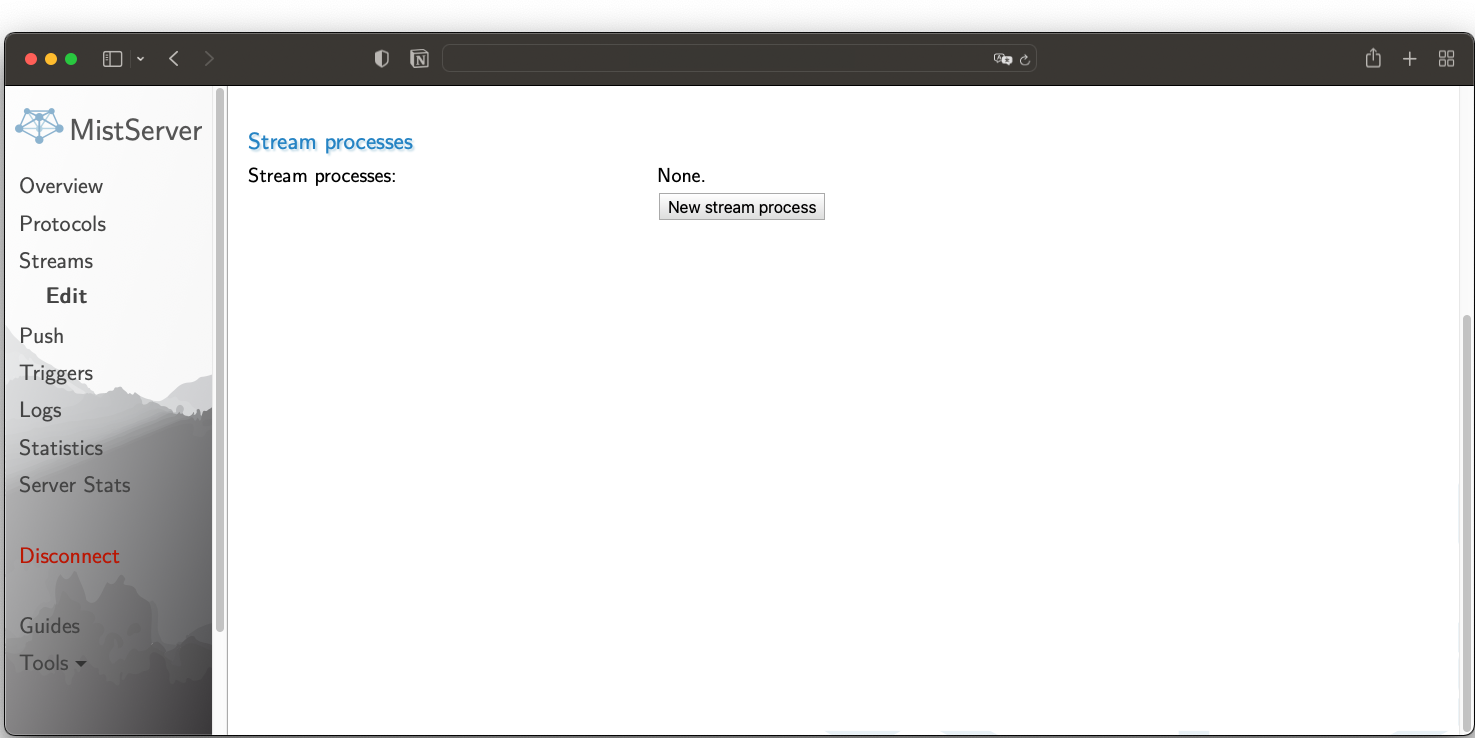
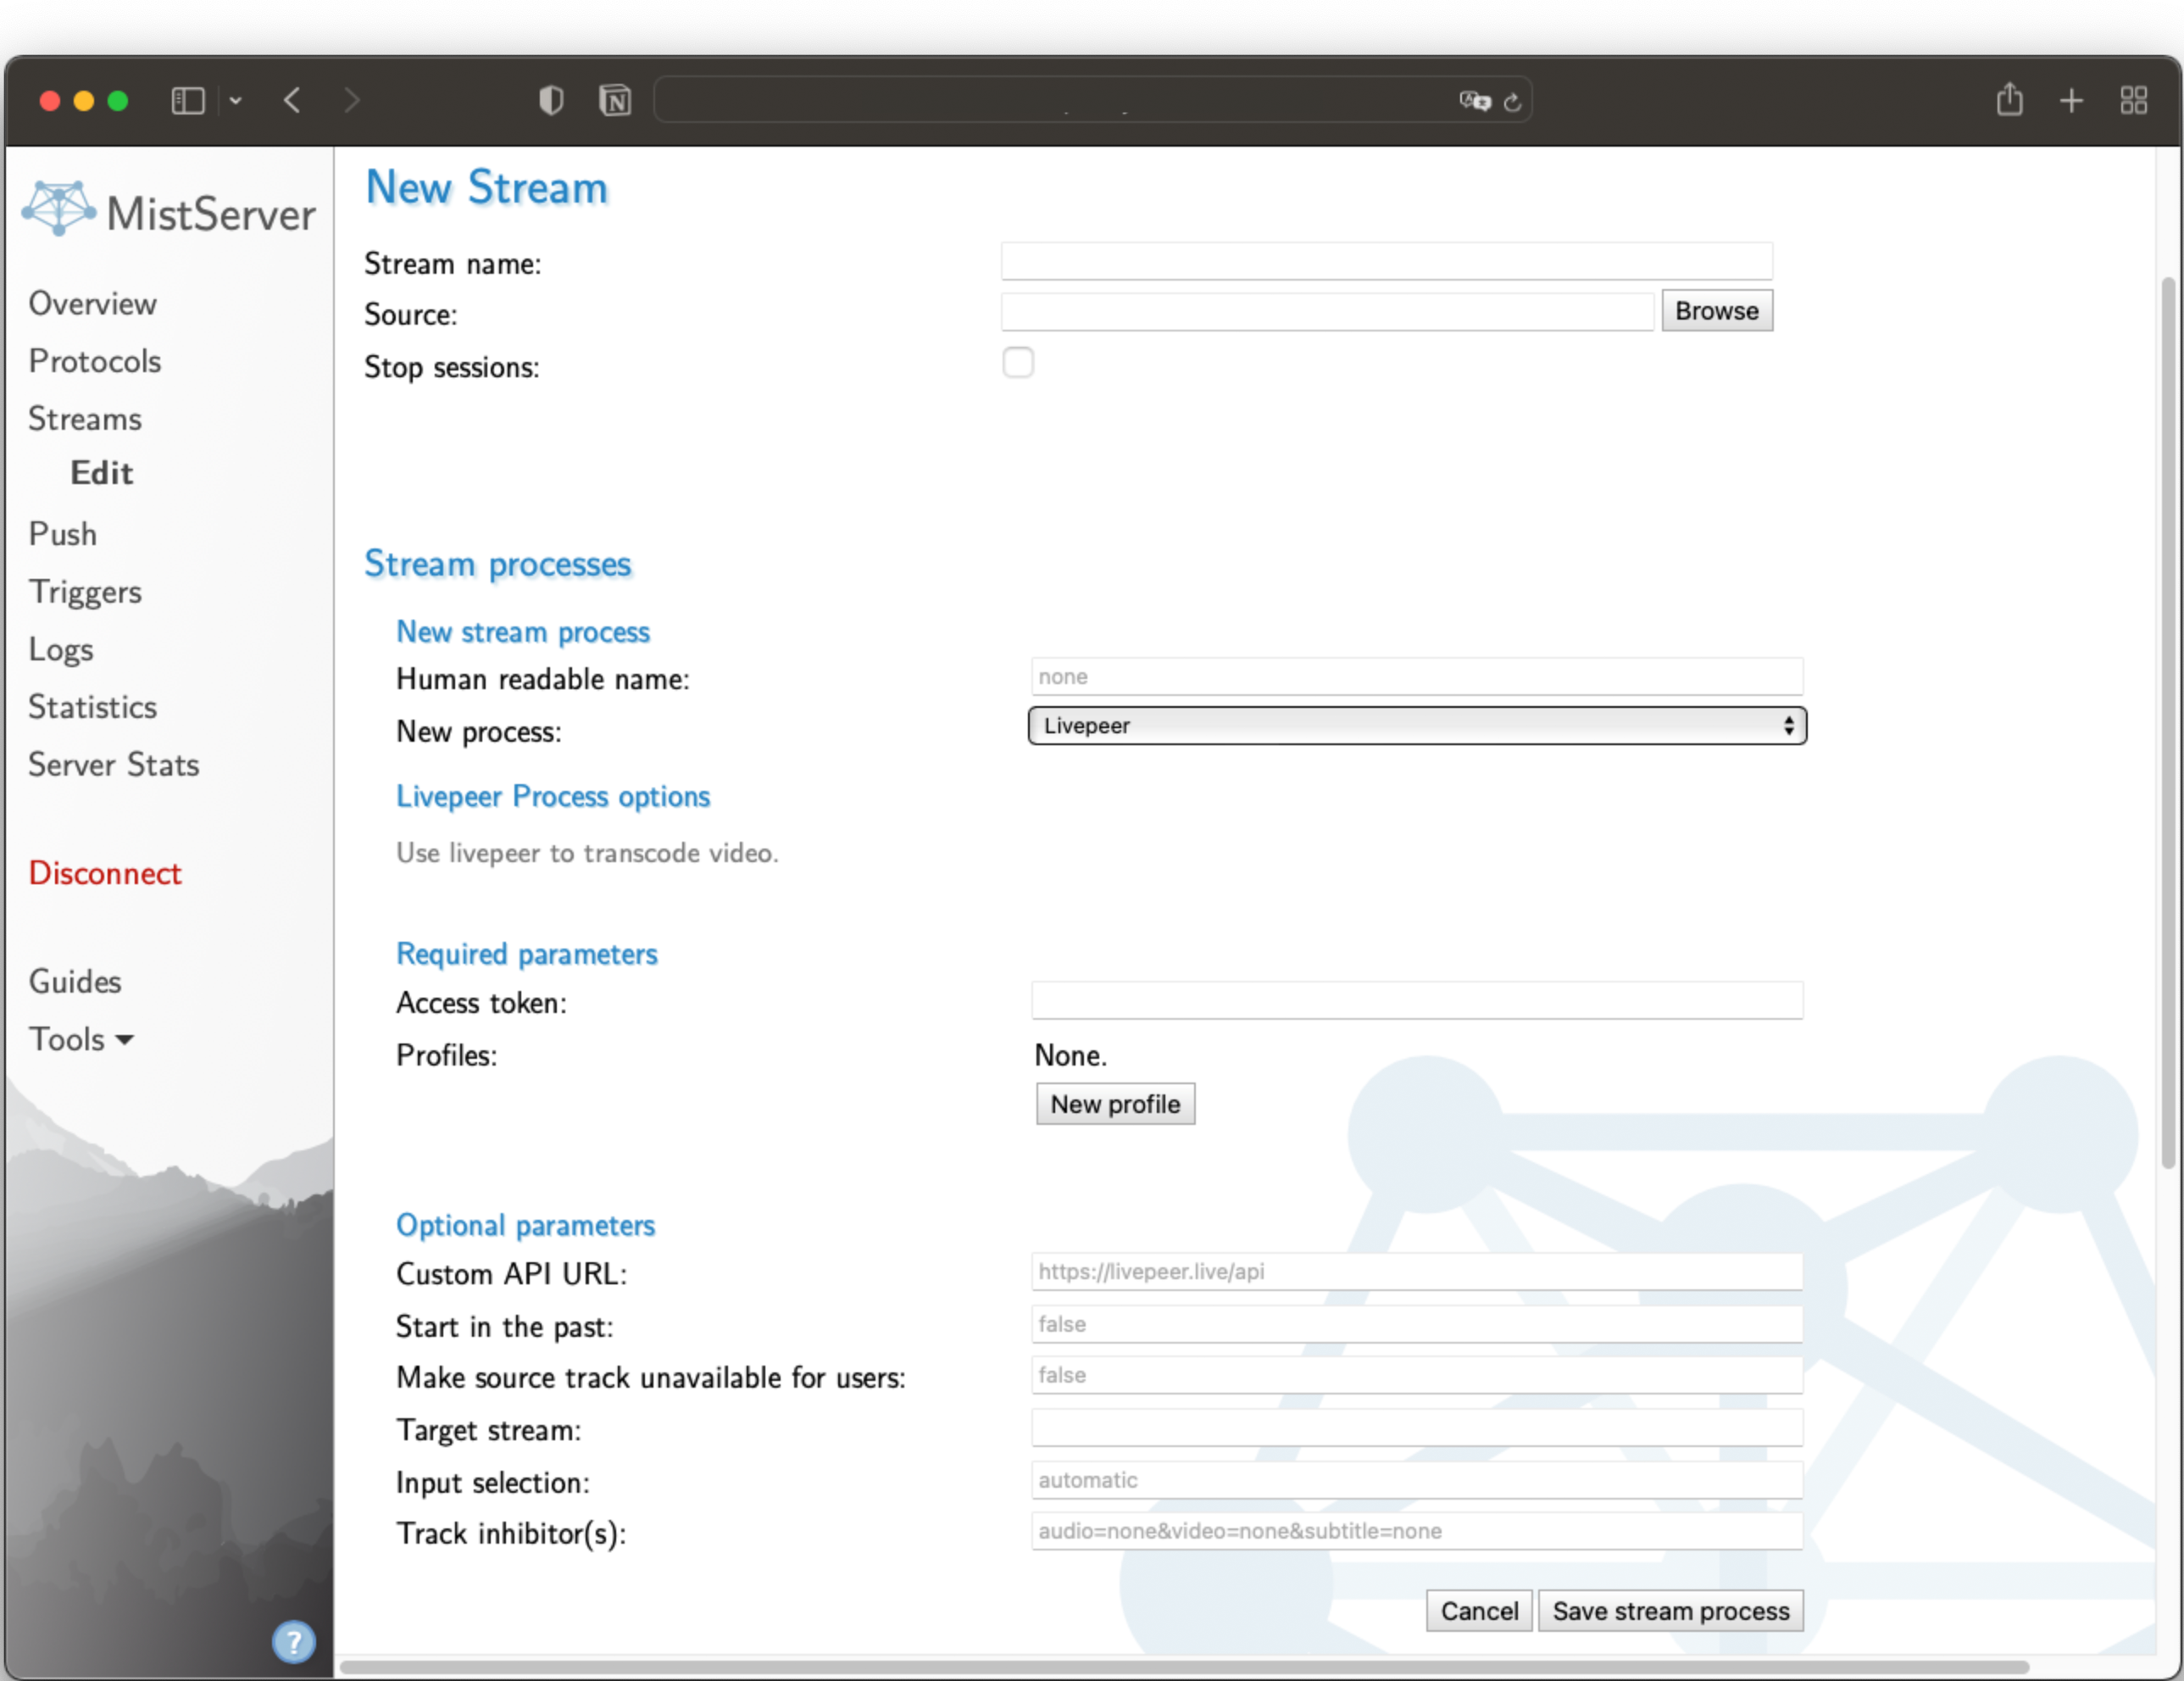
To set up Livepeer in MistServer you need to create or edit a configured live stream and click the button to add a new stream process, then select Livepeer.

The rest is quite easy, just fill in the access token (API key) you have received from Livepeer and click on the button to add a new profile.

The Human Readable name is what the profile will be named within MistServer. It's similar to Name, only Name is used for Livepeer to set the profile.
Keyframe interval: Keyframe Interval: The amount of seconds between full keyframes in the transcoded stream. The reason why this is important is because the keyframe interval is key in balancing bandwidth and latency. Most of the time you will want to match your source. For more information about this, you can refer to: https://news.mistserver.org/news/61/Stream+Latency
Profile: This determines the H264 profile used, which in turns affects how many devices support the H264 stream itself. Unless you know what you are doing you will want to stick to the default. The only exception is if you plan to use WebRTC, you will need to use high, without b-frames in that case.
Track inhibitors: If one of the tracks described here is available, MistServer will not send the transcode request for this profile. All track selection options are available as described in the Manual Ch 6. ‘Track selectors’. You use this function to make sure transcoding only happens if you ‘miss’ a certain quality. For example only adding 640x480 resolution if there is none available or adding a H264 track if there is none available.
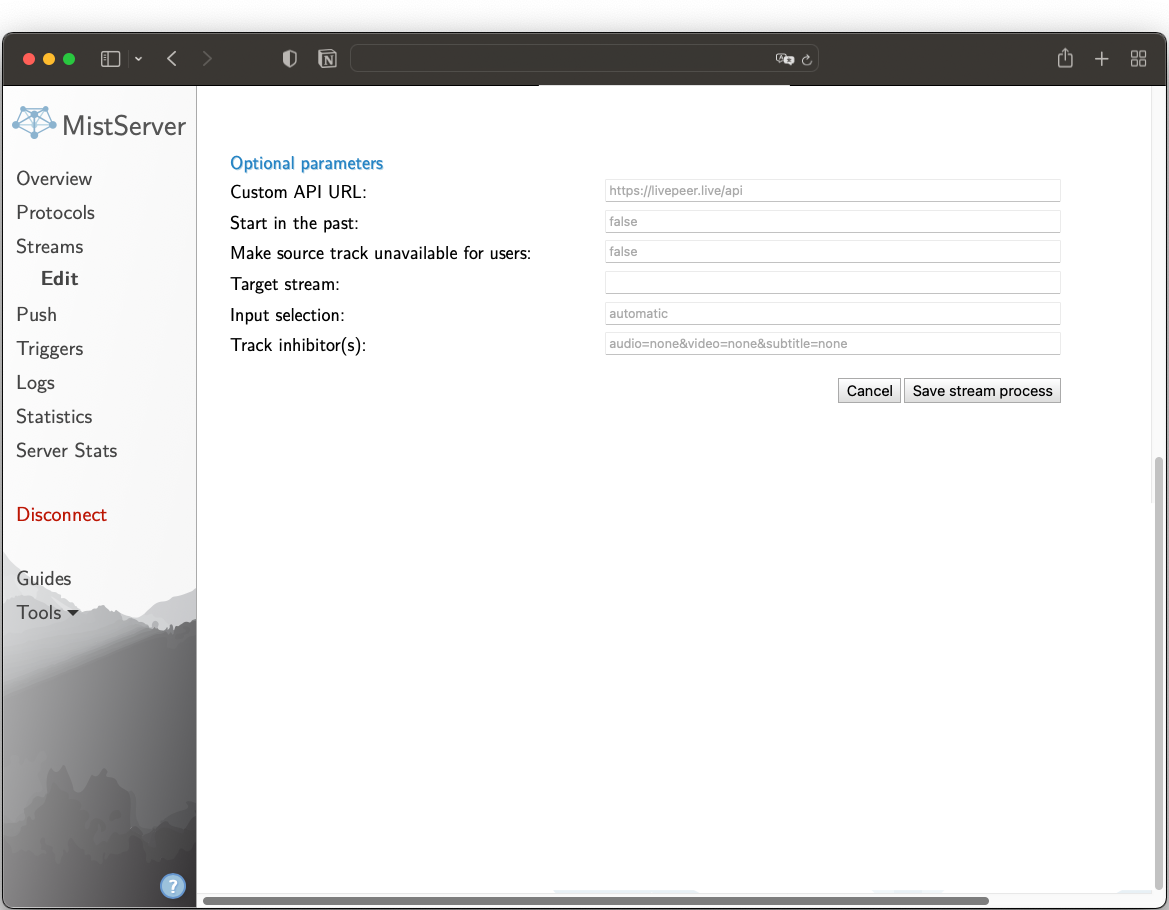
You can keep adding profiles for as many video tracks you want added to your original. It only makes sense to scale down in quality, making sure that your source is the highest quality track available. Trying to scale up the quality from a low quality track can not improve quality and will only waste bandwidth. The last options you could set are the optional parameters.

These are optional parameters and not necessary, but allow you to do handy
things with your transcoded tracks. You could for example send the additional
stream qualities to another stream within MistServer, but also hide the original
or transcoded qualities. Options like these allow you to keep your streams
clean, letting viewers only connect to the encoded qualities or making sure
processes only use the source to transcode. This could be especially useful if
your source quality is too high bitrate for most of your users.
Audio streams: Selects the audio track that is pushed to the stream process.
It defaults to ‘none’, because Livepeer currently only transcodes video. Custom
API Url: The API url MistServer will send the Livepeer request to. If you’re
running your own copy of the livepeer.com stack, you can change this to use it.
Start in the past: Setting this to ‘True’ will have MistServer send everything
that is available on the video track towards Livepeer instead of starting as
close to the live point as possible.
Target stream: Fill in the streamname within MistServer to push the additional
encoded tracks towards this stream. If left blank, the new tracks are added to
the source stream.
Source track mask: This mask determines which processes/connections within
MistServer can see the source video track. The default is to keep the original
value (which would be everything unless some other process has set this option
to something else).
Input selection: Selects the track that is used as the source quality.
Defaults to the highest bit rate video track available. All track selection
options are available as described in the Manual Ch 6. ‘Track selectors’.
Output track mask: This mask determines which processes/connections within
MistServer can see the transcoded video track. The default is not to limit
visibility.
Undo masks on process exit/fail: This option will have MistServer remove the
source/output track masks if transcoding fails for some reason. This makes sure
your source or transcoded stream would become available again if it's otherwise
hidden.
Track inhibitors: If one of the tracks described here is available, MistServer
will not use ANY of the profiles above. You can use this to entirely activate
all profiles depending on a condition. For example, only send profiles to
Livepeer if the source stream is good enough quality to warrant lower quality
profiles. All track selection options are available as described in the Manual
Ch 6. Track selectors.
Once set up, there is no further configuration needed to actually make use of the newly transcoded tracks. MistServer will automatically switch qualities where the chosen protocol supports this, as needed. As you can see it is rather easy to add transcoded quality levels to a stream using MistServer and Livepeer. Transcoding on the Livepeer network makes playback easier for your users when bandwidth is an issue or could help you save your bandwidth when you know your users are often using devices with smaller screens. While not necessary for streaming, transcoding your stream will add a lot of flexibility to your platform and generally improves viewer experience for your viewers. So it is definitely a good idea to implement transcoding if you are currently working with only one video quality and want to improve your platform’s reach. Using the MistServer and Livepeer integration is a great way to get this setup with minimal effort.
A good next step would be to adjust the skin of your player to the expectation and experience of your users. For instructions on how to do that, you can refer to this blogpost: https://news.mistserver.org/news/102/Skins+for+the+MistServer+Meta-player
In closing, if you found this post useful, check in with us regularly for tips and tricks on MistServer, Livepeer and OTT in general!