Export to IPFS with Livepeer Video Services
Export to IPFS with Livepeer Video Services
Where to store NFTs (non-fungible tokens) is just as important as what type of NFTs to create. In the process of making them, storage is an essential part of it as it allows the NFTs to be preserved.
IPFS, short for Interplanetary File System, has been around for a while, which means its network has had time to mature and be reliable. Their protocol is used by the majority of projects that utilize decentralized storage, including NFTs. By exporting assets to IPFS, not only will they generate a unique fingerprint called content identifier (CID) for the NFTs, but also this data will be preserved due to the support of their community for maintaining and expanding their decentralized ecosystem.
Livepeer Video Services makes the process of exporting to IPFS easy by using the Video on Demand (VoD) API. With a simple step, assets that get uploaded to Livepeer Video Services will have the option to be exported to IPFS. Once the asset has been exported they are ready to be minted. This reduces the process of transcoding the assets and then taking that transcoded asset from Livepeer VIdeo Services and then using IPFS.
In this tutorial, we will look at the ease of using the VoD API to upload assets to LVS and then export them to IPFS.
Access to a free Postman and Livepeer Video Services account is required. Visit How to make API calls with Postman and LVS tutorial for instructions on getting set up.
Step 1
There are two ways to provide Livepeer with assets for VoD, either importing or uploading the asset. The following steps address how to implement both.
Step 1A: Import an asset
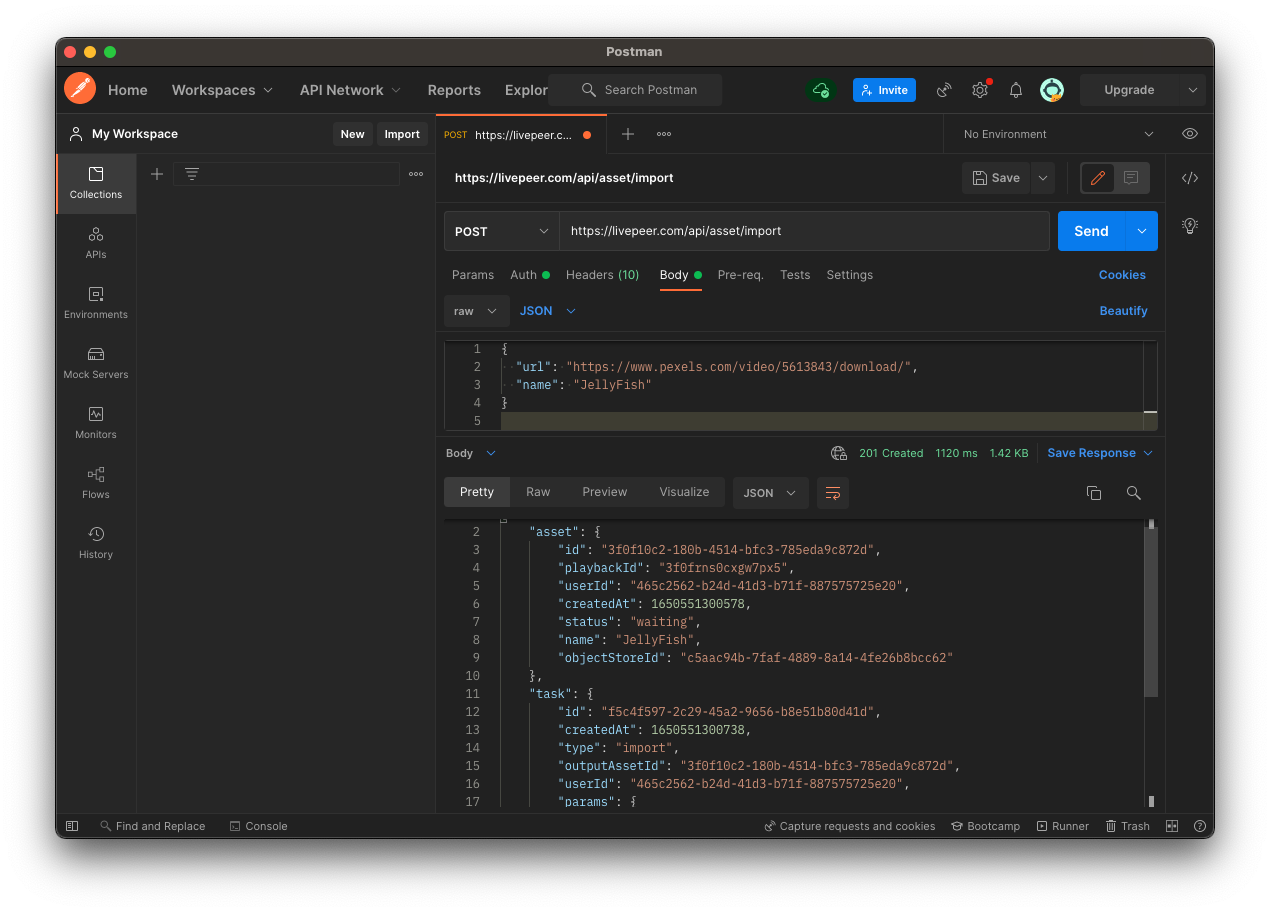
- To import an asset from an external URL, select the POST option and paste in Livepeer’s base URL for importing an asset https://livepeer.com/api/asset/import
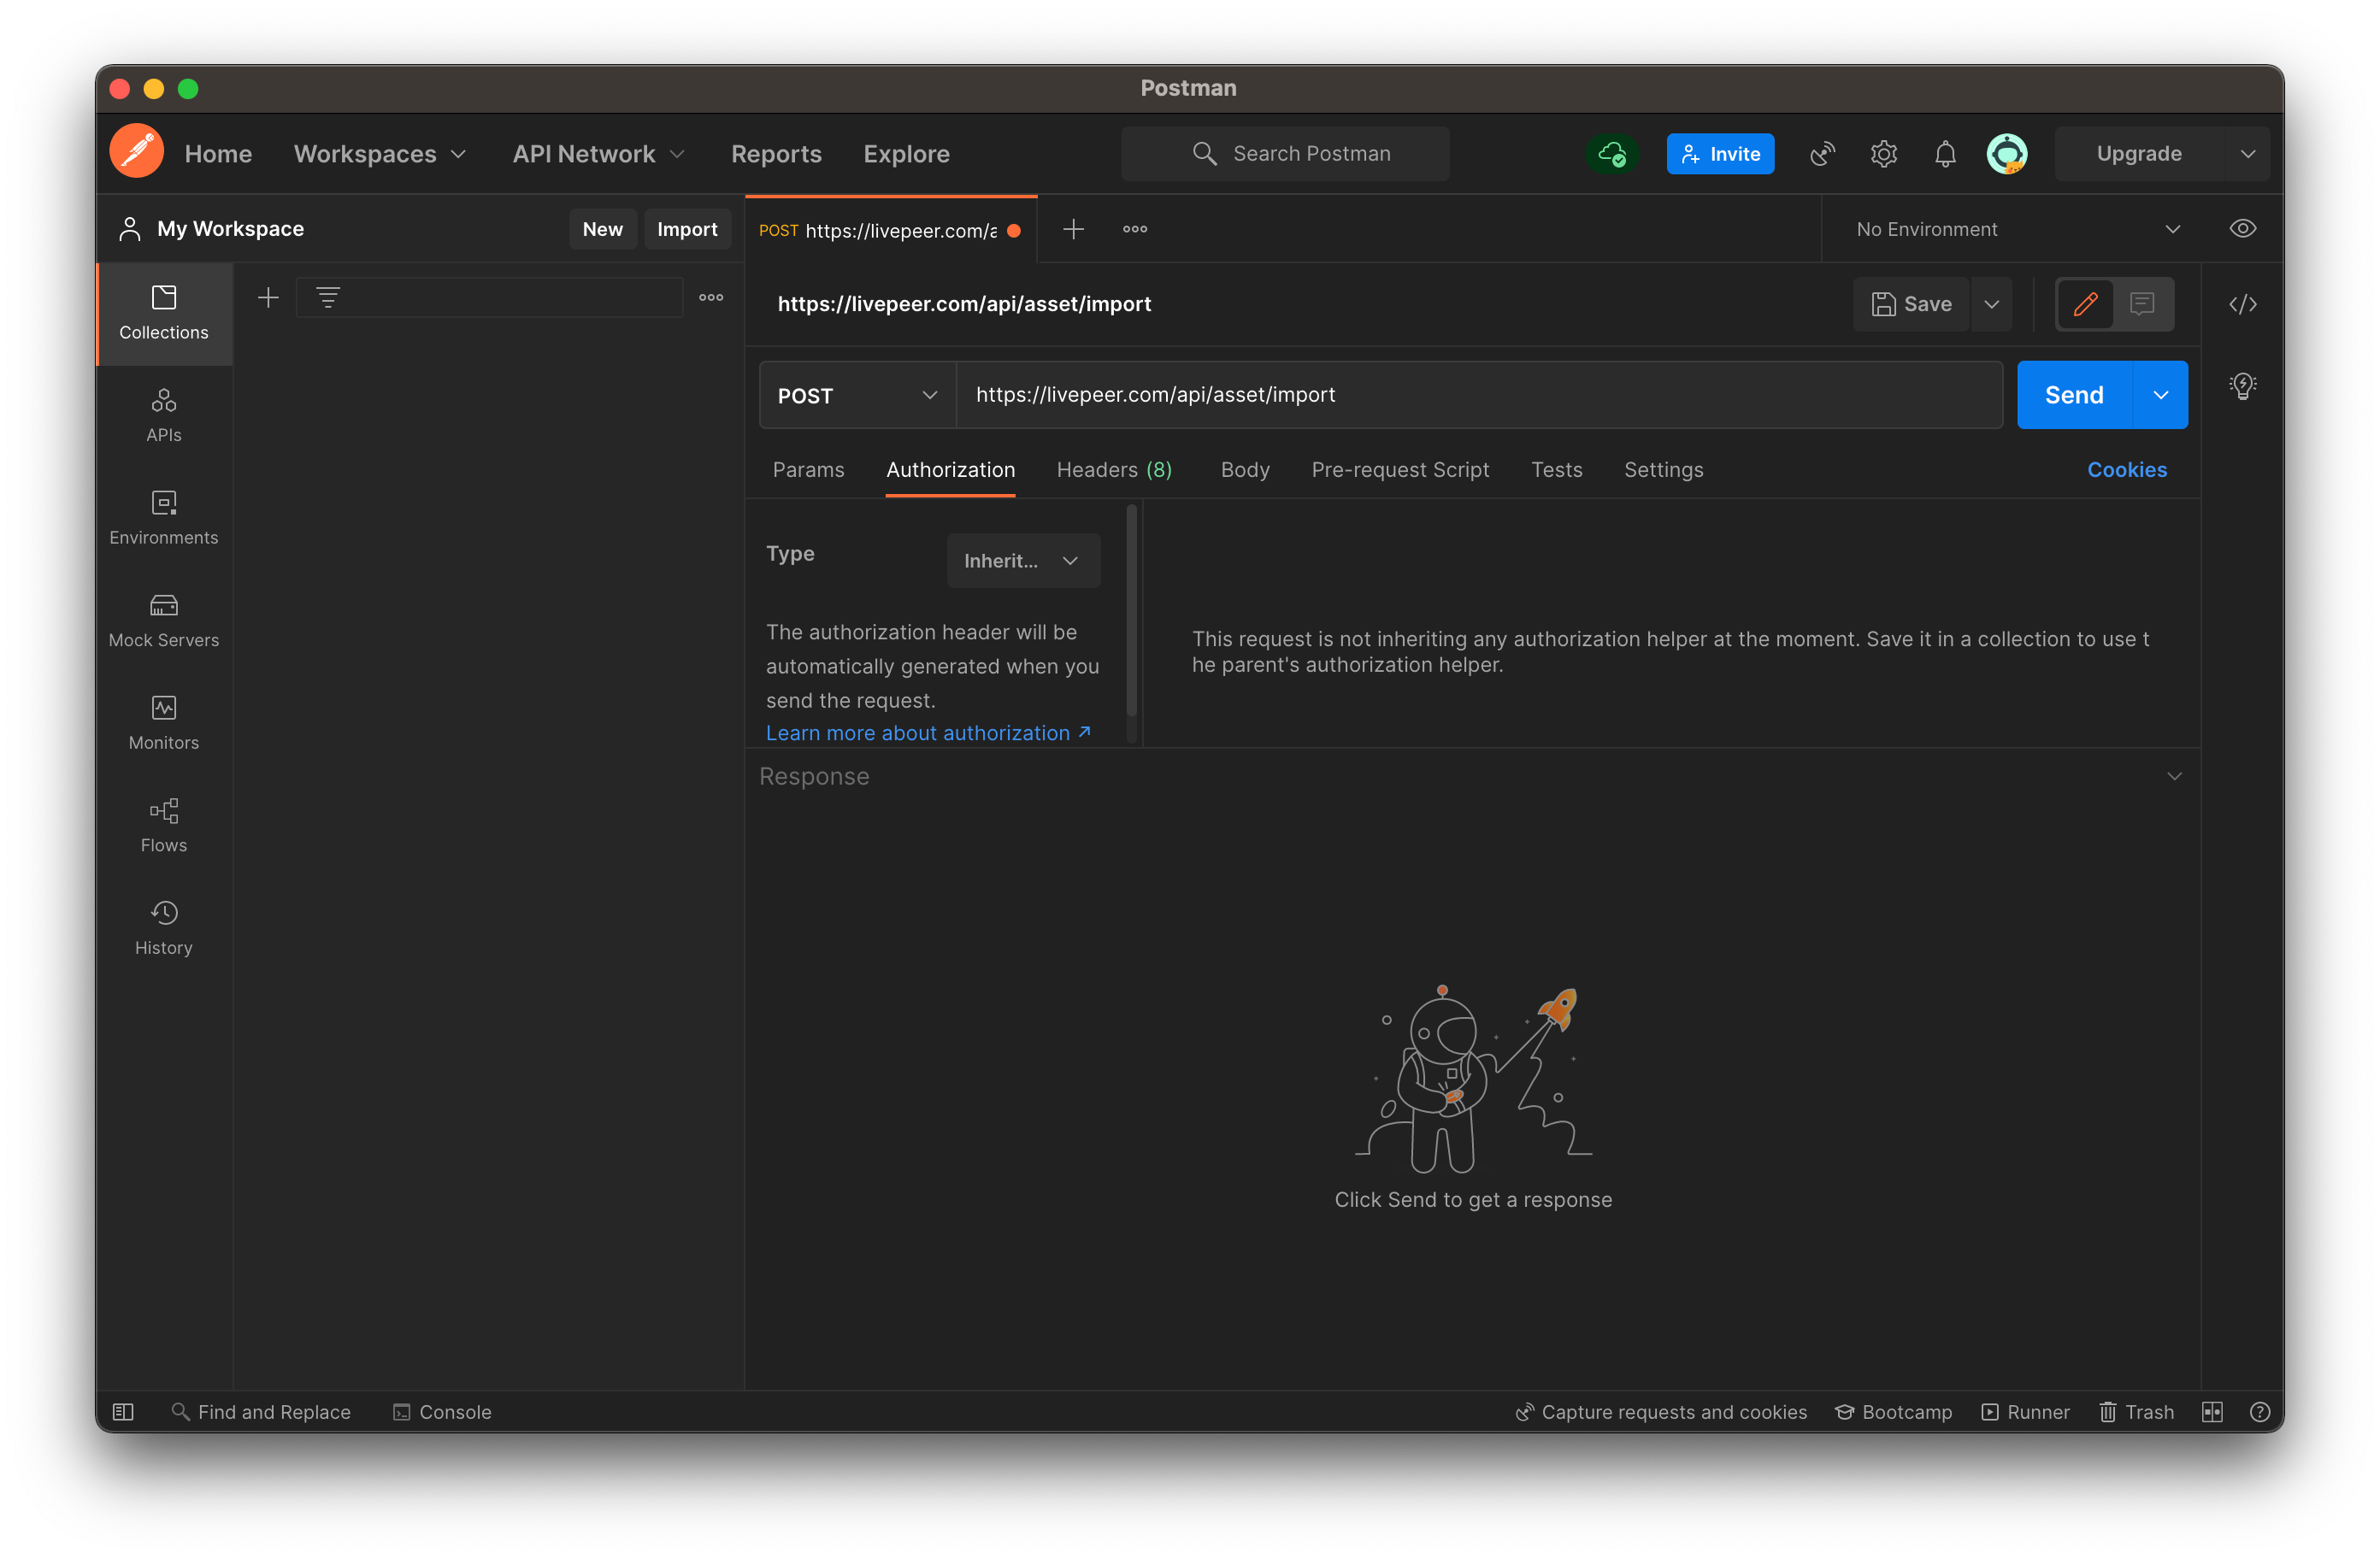
- Then underneath the URL, click on the Authorization tab, and select Bearer Token as the type
- Copy and paste your API key from Livepeer Video Services
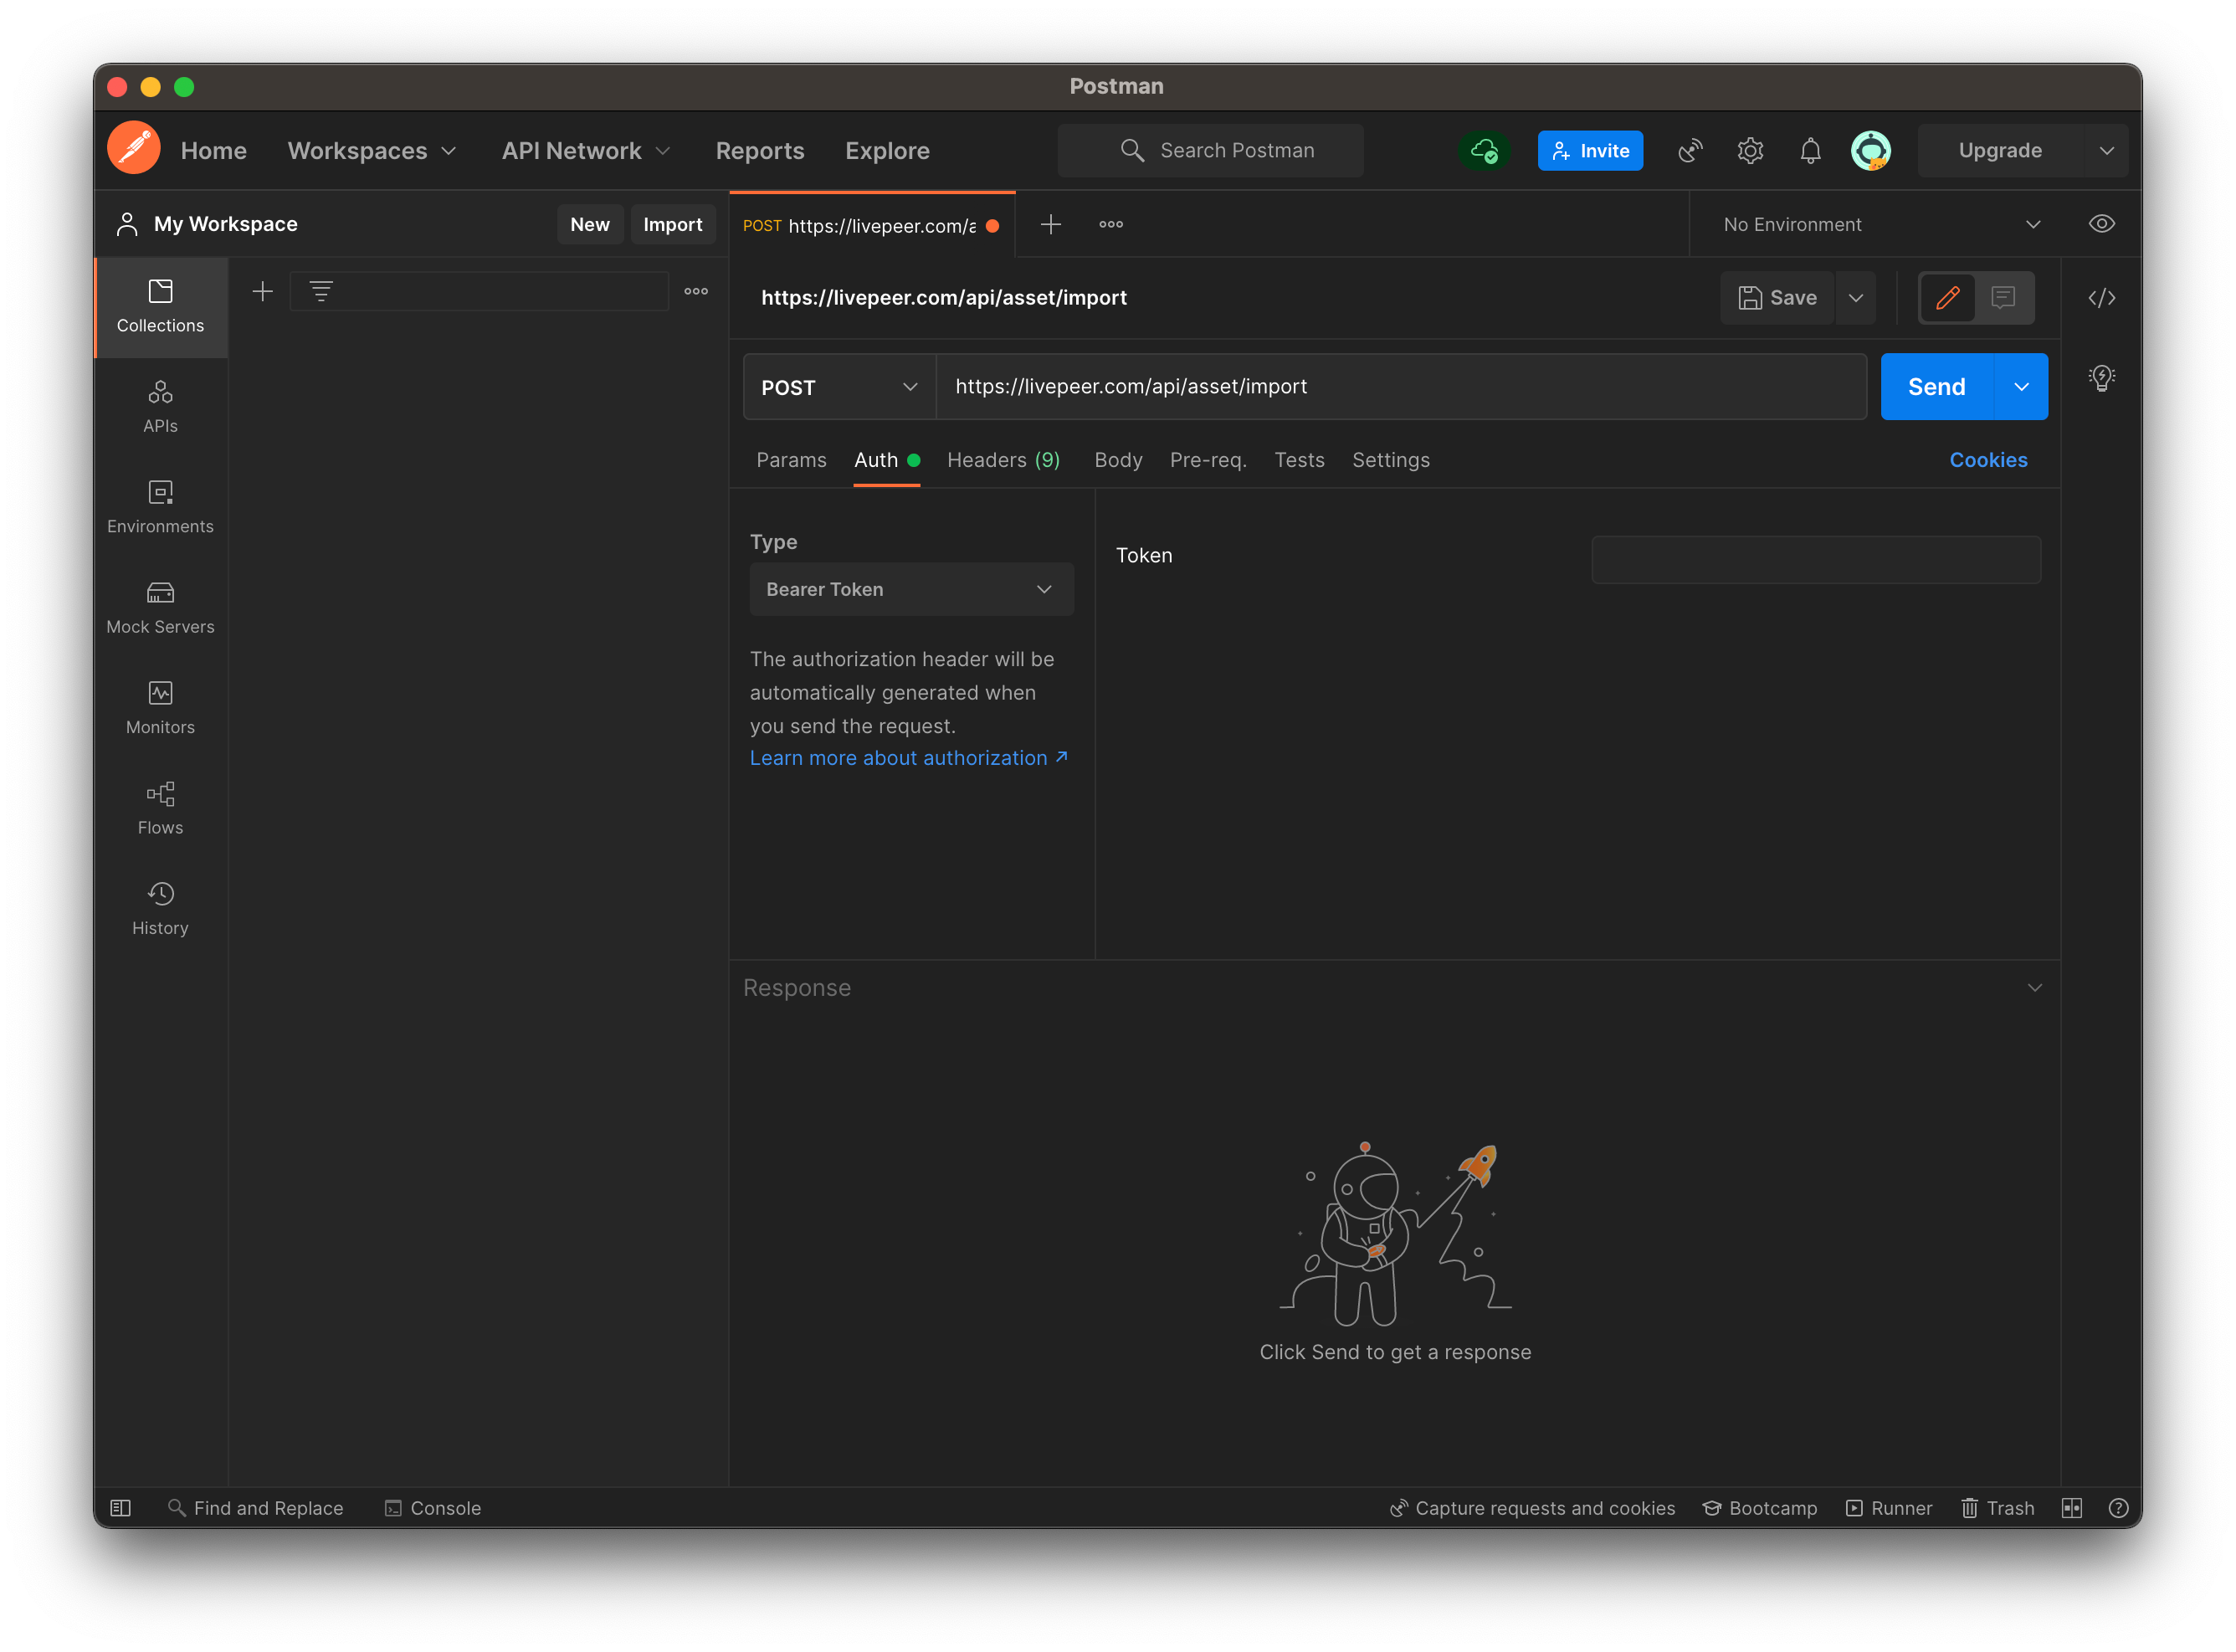
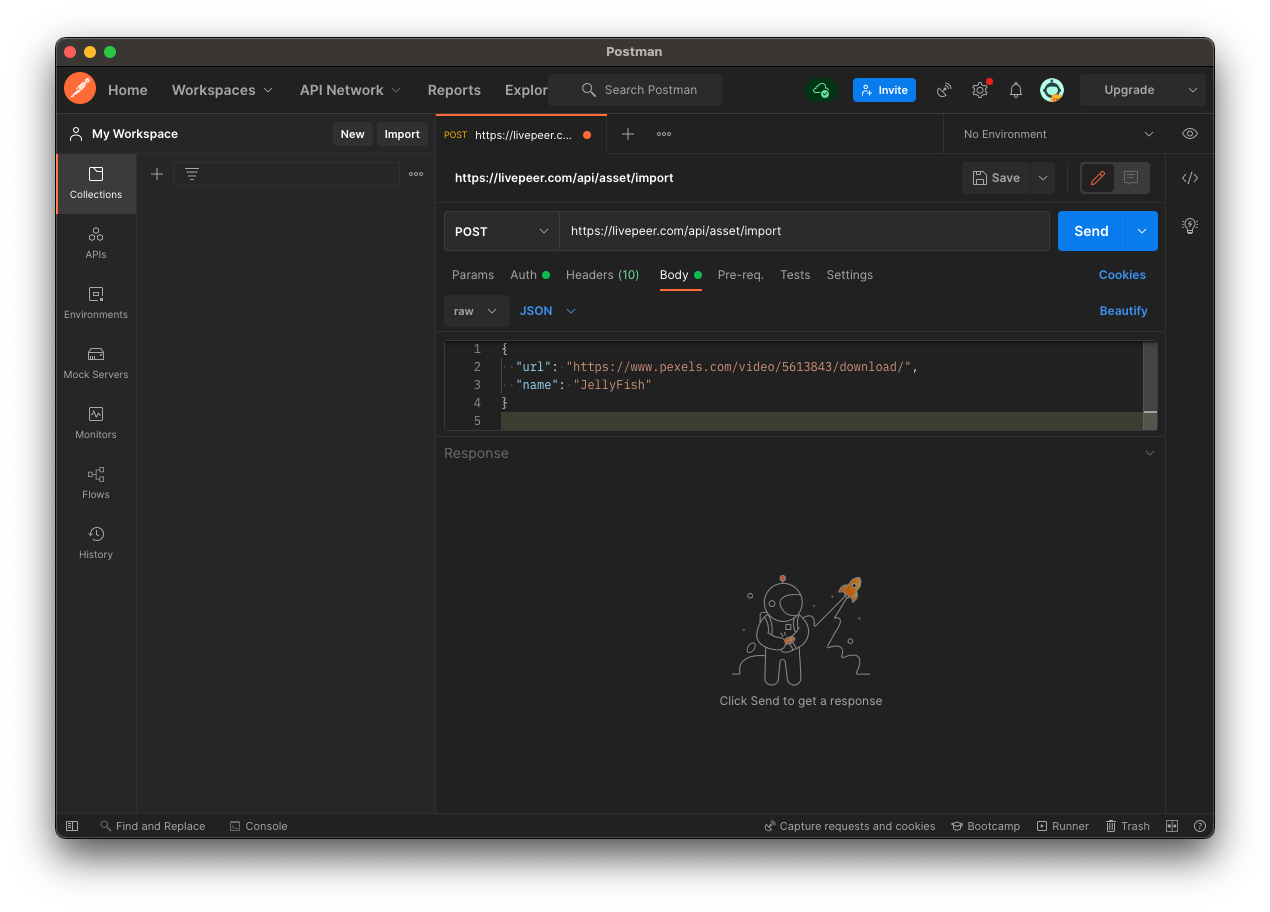
- Select the Body tab and underneath it select the raw radio button
- Click the Text drop-down menu and select the JSON option
- In the text box field below, paste the following code which is from the API reference. You can change the name to whatever you want as this is for the name of your stream and the URL is the URL file of your asset
{
“url”: ”https://www.pexels.com/video/5613843/download/”,
"name": "JellyFish"
}
- Click the code icon < > on the right side menu to confirm the format is the same as the cURL example in the API reference
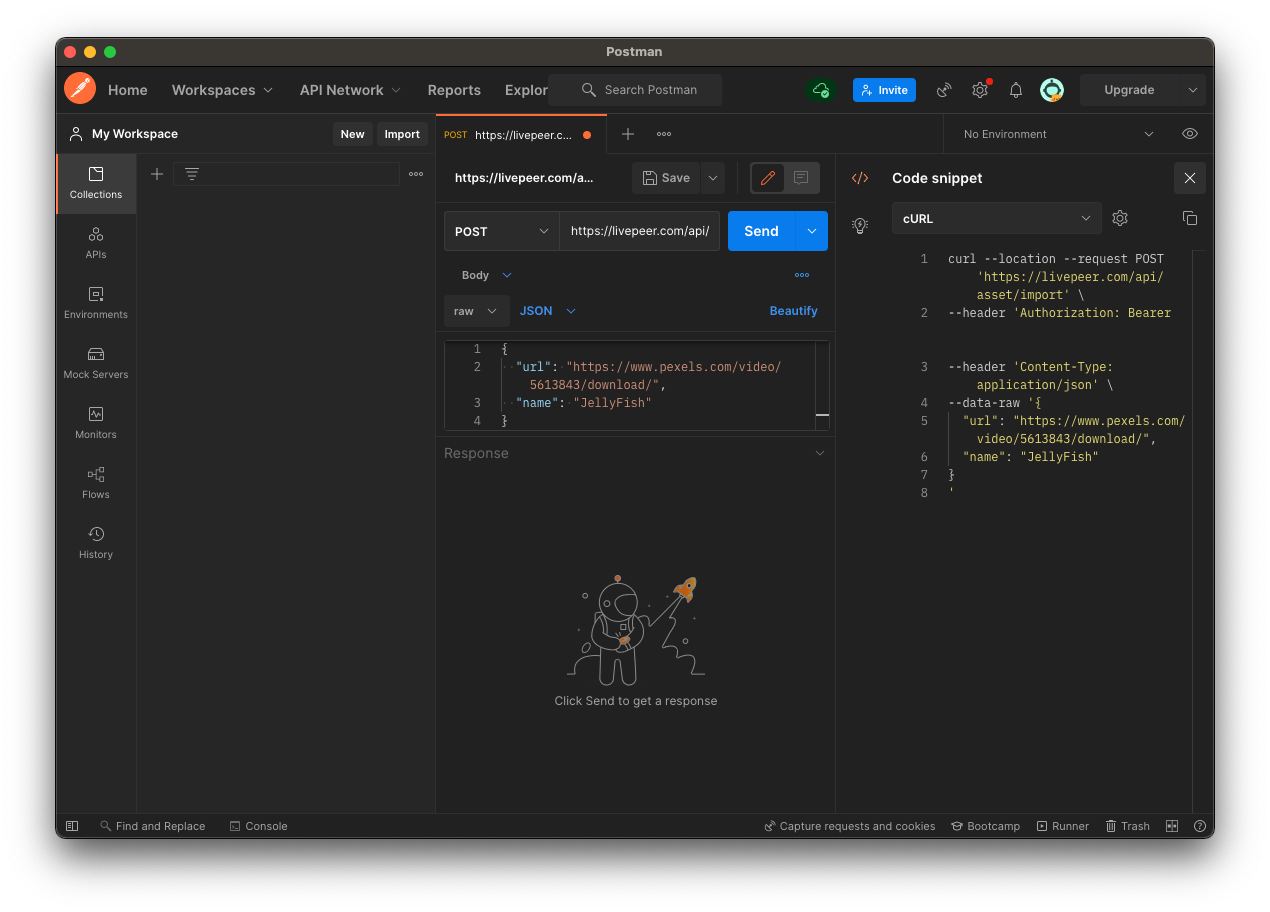
- Now click the Send button and you should receive a confirmation that it went through with a 201 status
Step 1B: Upload an asset
This is a two-step process that allows the user to provide the asset by directly uploading to Livepeer Video Services.
Step 1B-1 - Create URL for direct upload
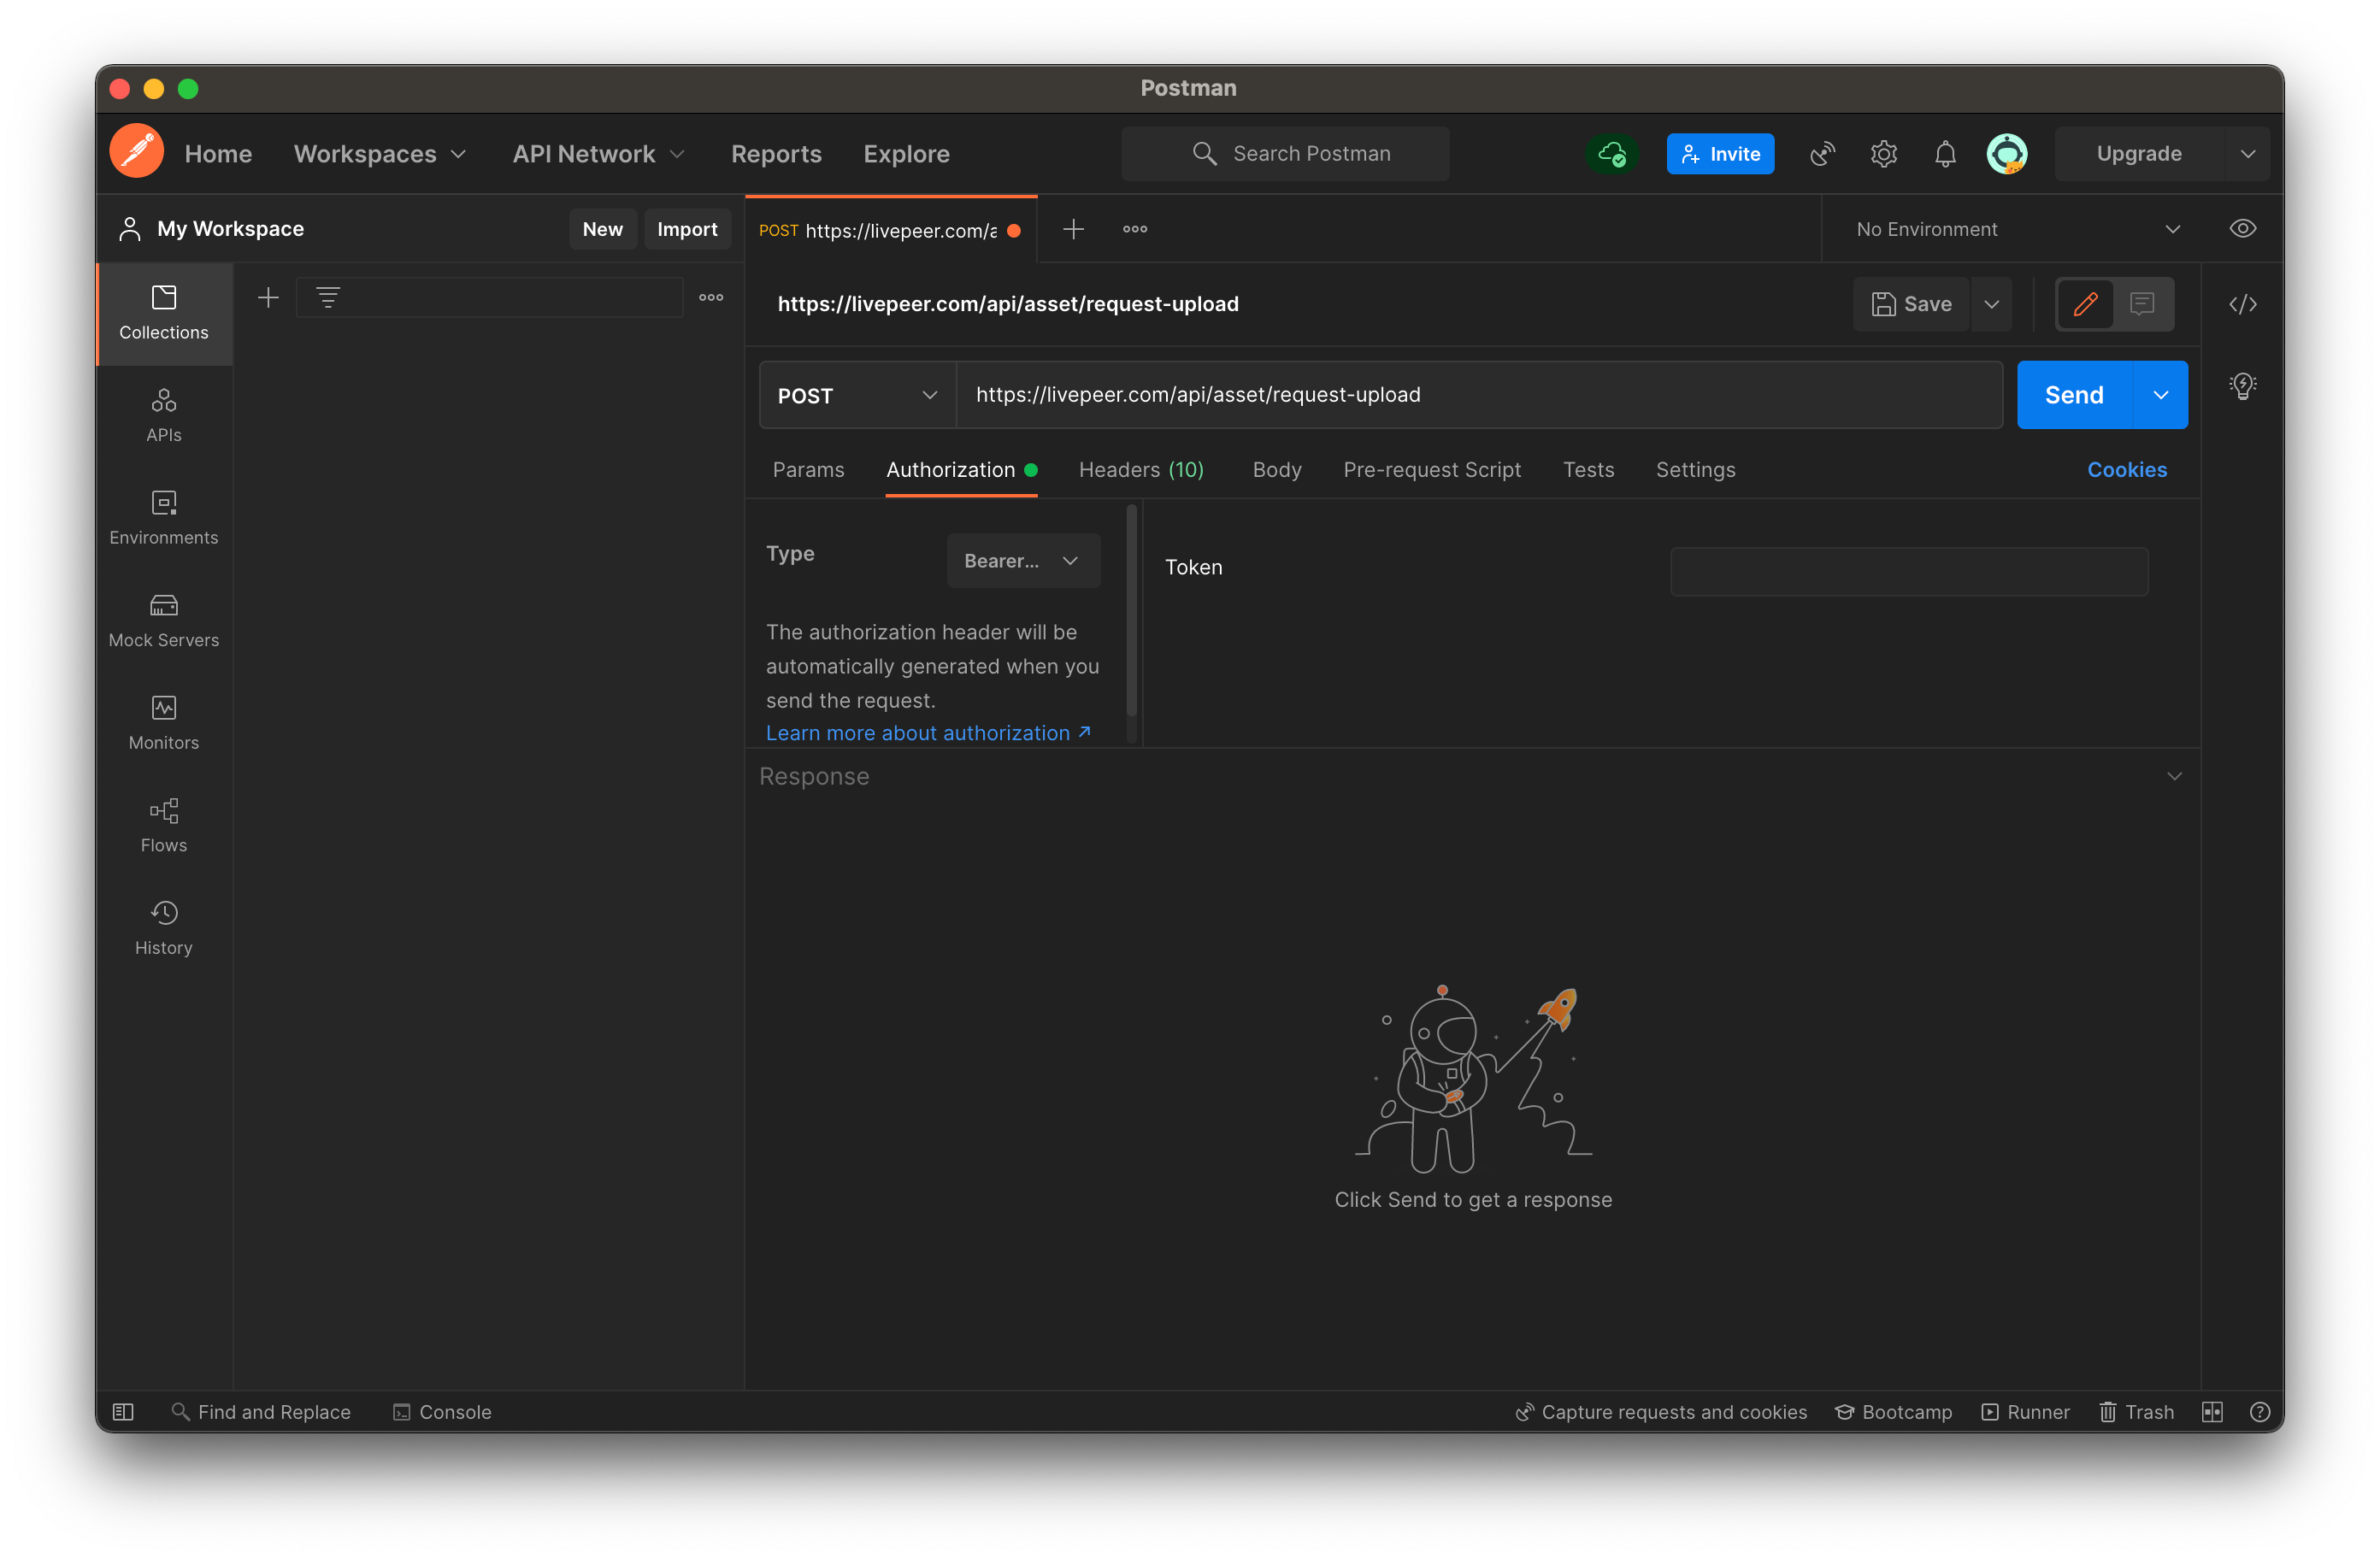
- Select the POST option and paste in Livepeer Video Services’ URL for importing an asset https://livepeer.com/api/asset/request-upload
- Then underneath the URL, click on the Authorization tab, and select Bearer Token as the type
- Copy and paste your API key from Livepeer Video Services
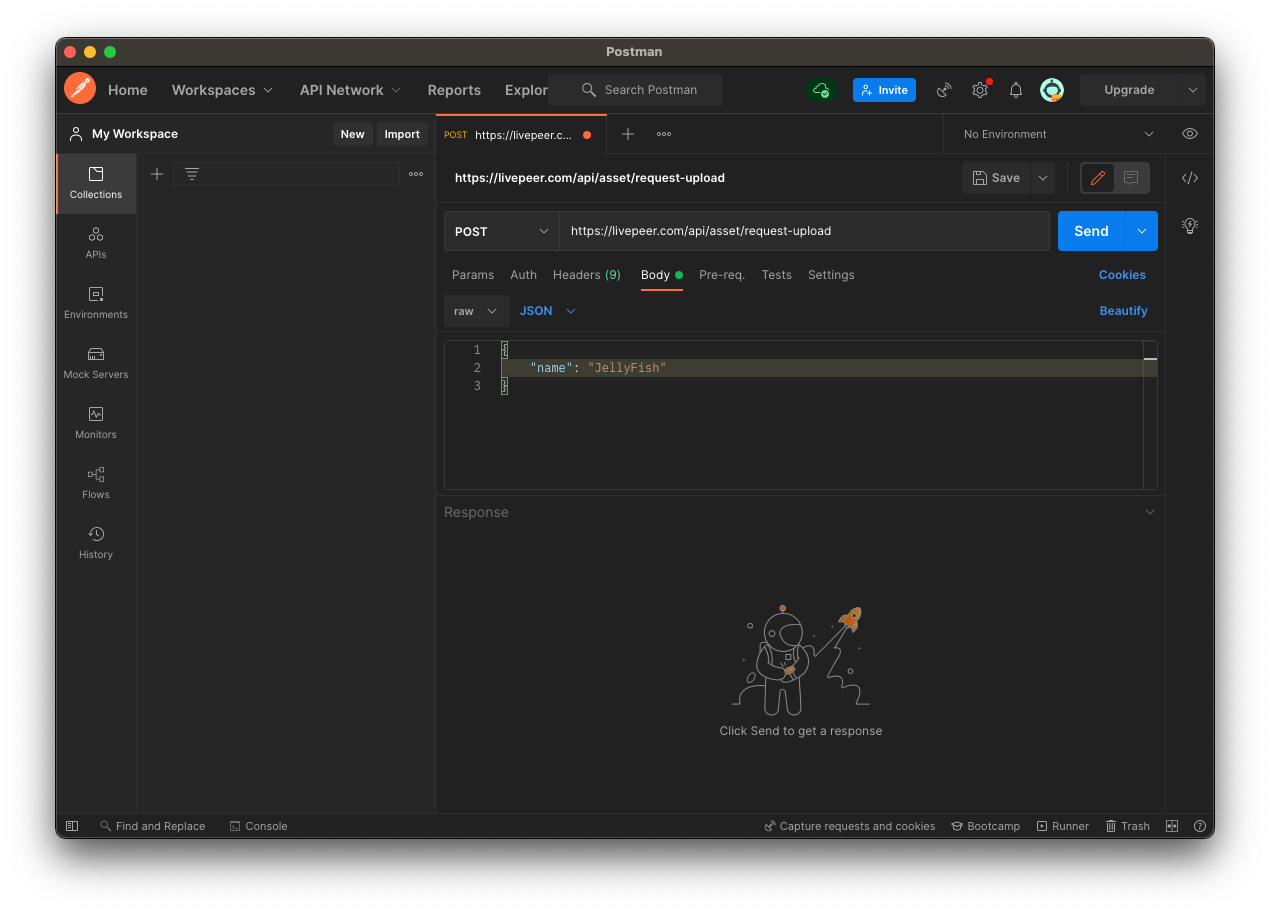
- In the text box field below, paste the following code which is from the API Reference. You can change the name to whatever you want as this is for the name of your stream.
{
"name": "JellyFish"
}
- Click the code icon < > on the right side menu to confirm the format is the same as the cURL example in the API reference
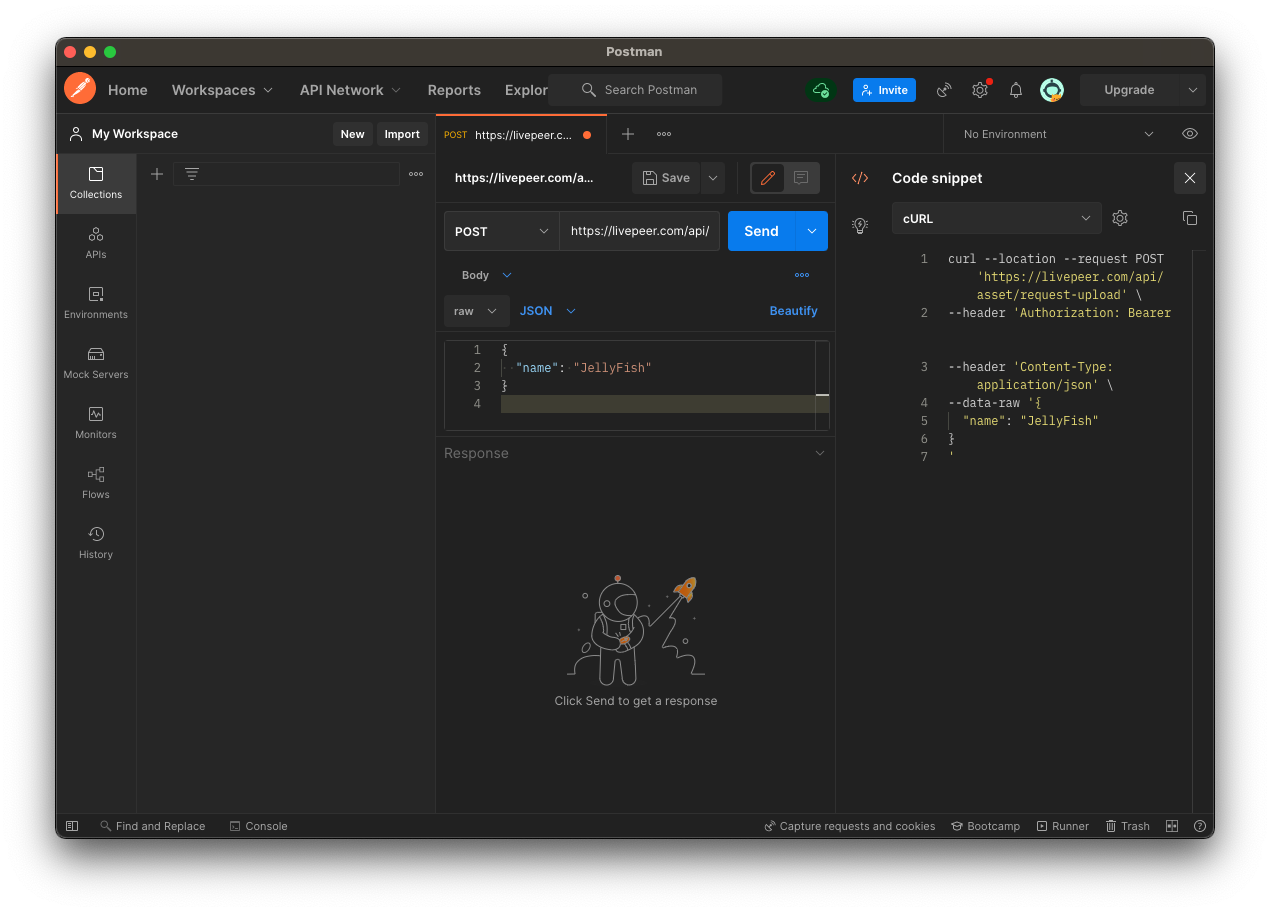
- Click the blue send button and you should get back a 200 status with the response including the parameters of the stream
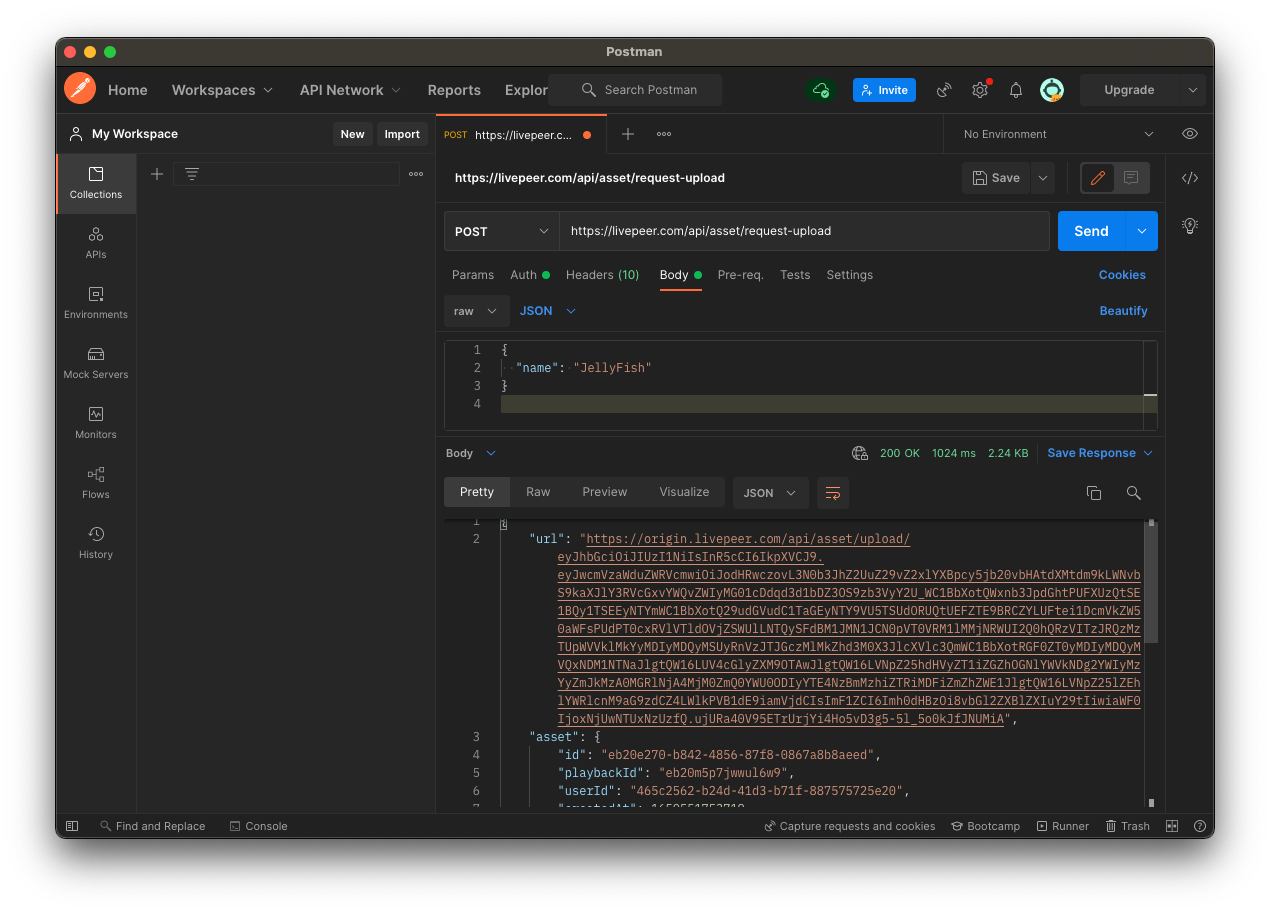
Now that the URL for direct upload is created, time to upload the content.
*Copy the URL and the ID of the asset/task from the response for the next part.
Step 1B-2 - Upload the contents
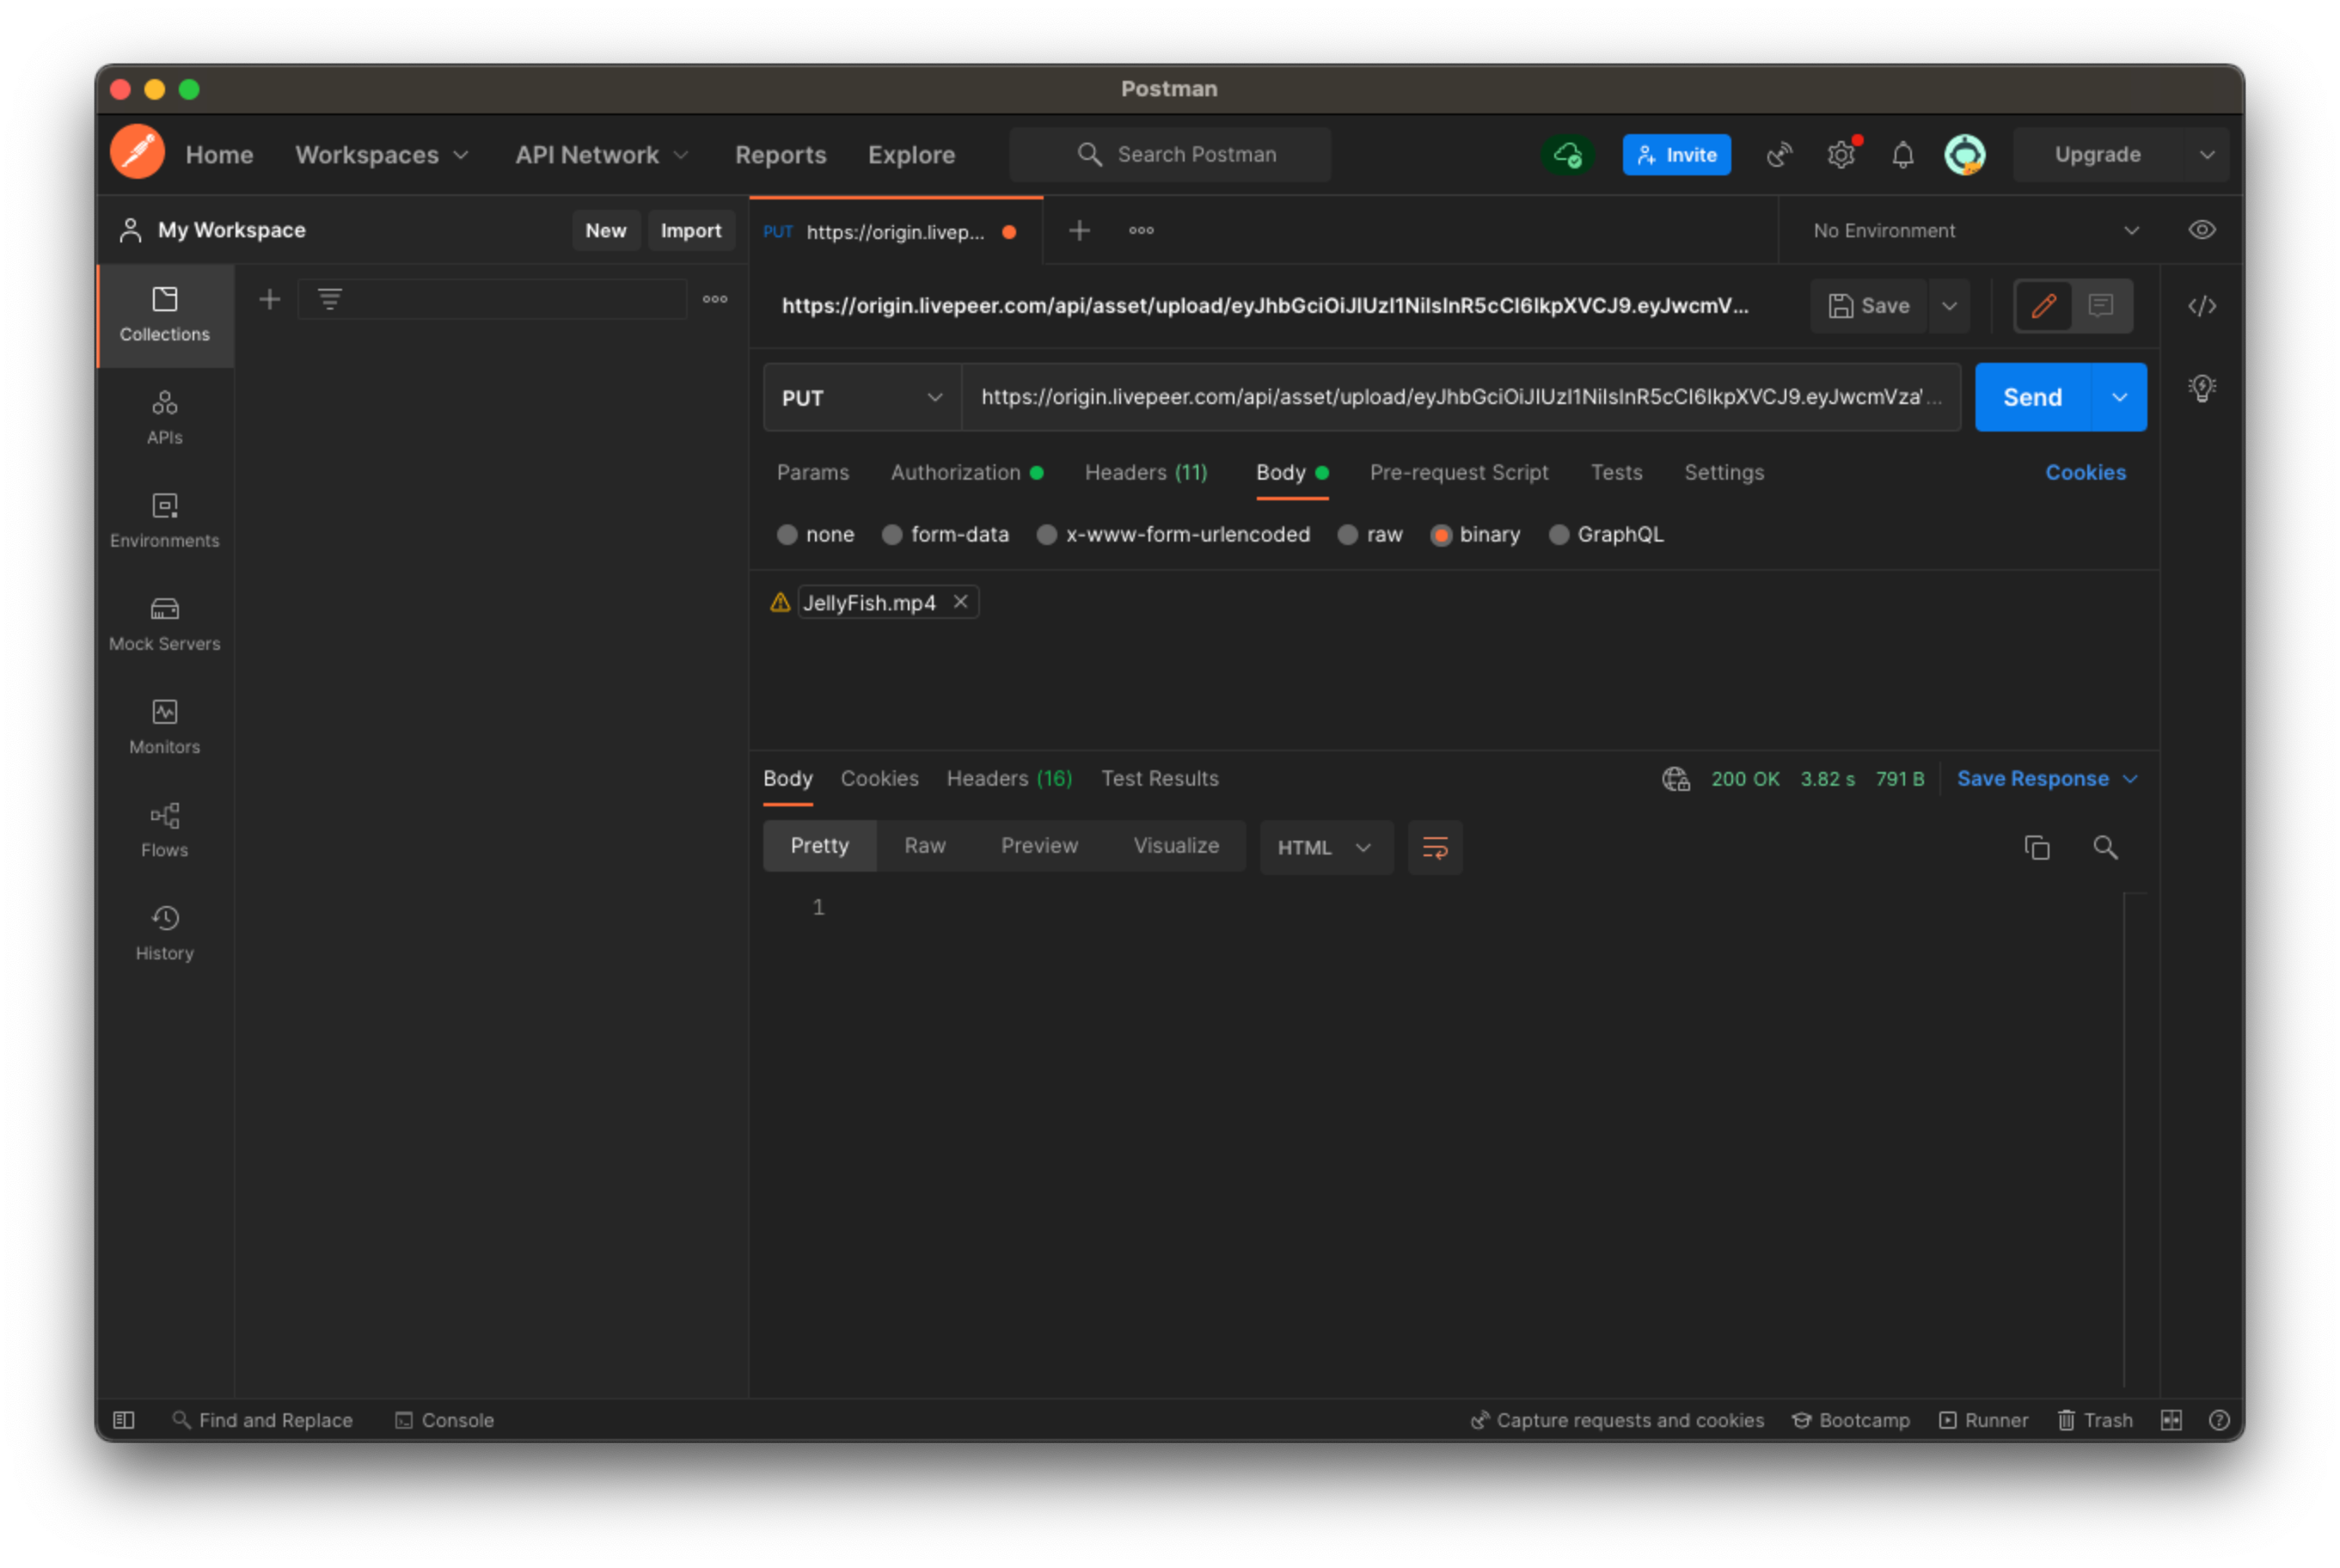
- Replace POST with PUT and insert the URL from the response in the previous step. It should look similar to the following:
https://origin.livepeer.com/api/asset/upload/eyJhbGciOiJIUzI1NiIsInR5cCI6IkpXVCJ9.eyJwcmVzaWduZWRVcmwiOiJodHRwczovL3N0b3JhZ2UuZ29vZ2xlYXBpcy5jb20vbHAtdXMtdm9kLWNvbS9kaXJlY3RVcGxvYWQvZWIyMG01cDdqd3d1bDZ3OS9zb3VyY2U_WC1BbXotQWxnb3JpdGhtPUFXUzQtSE1BQy1TSEEyNTYmWC1BbXotQ29udGVudC1TaGEyNTY9VU5TSUdORUQtUEFZTE9BRCZYLUFtei1DcmVkZW50aWFsPUdPT0cxRVlVTldOVjZSWUlLNTQySFdBM1JMN1JCN0pVT0VRM1lMMjNRWUI2Q0hQRzVITzJRQzMzTUpWVVklMkYyMDIyMDQyMSUyRnVzJTJGczMlMkZhd3M0X3JlcXVlc3QmWC1BbXotRGF0ZT0yMDIyMDQyMVQxNDM1NTNaJlgtQW16LUV4cGlyZXM9OTAwJlgtQW16LVNpZ25hdHVyZT1iZGZhOGNlYWVkNDg2YWIyMzYyZmJkMzA0MGRlNjA4MjM0ZmQ0YWU0ODIyYTE4NzBmMzhiZTRiMDFiZmZhZWE1JlgtQW16LVNpZ25lZEhlYWRlcnM9aG9zdCZ4LWlkPVB1dE9iamVjdCIsImF1ZCI6Imh0dHBzOi8vbGl2ZXBlZXIuY29tIiwiaWF0IjoxNjUwNTUxNzUzfQ.ujURa40V95ETrUrjYi4Ho5vD3g5-5l_5o0kJfJNUMiA- Select the Headers tab and for the Key select Content-Type and the Value select video/mp4
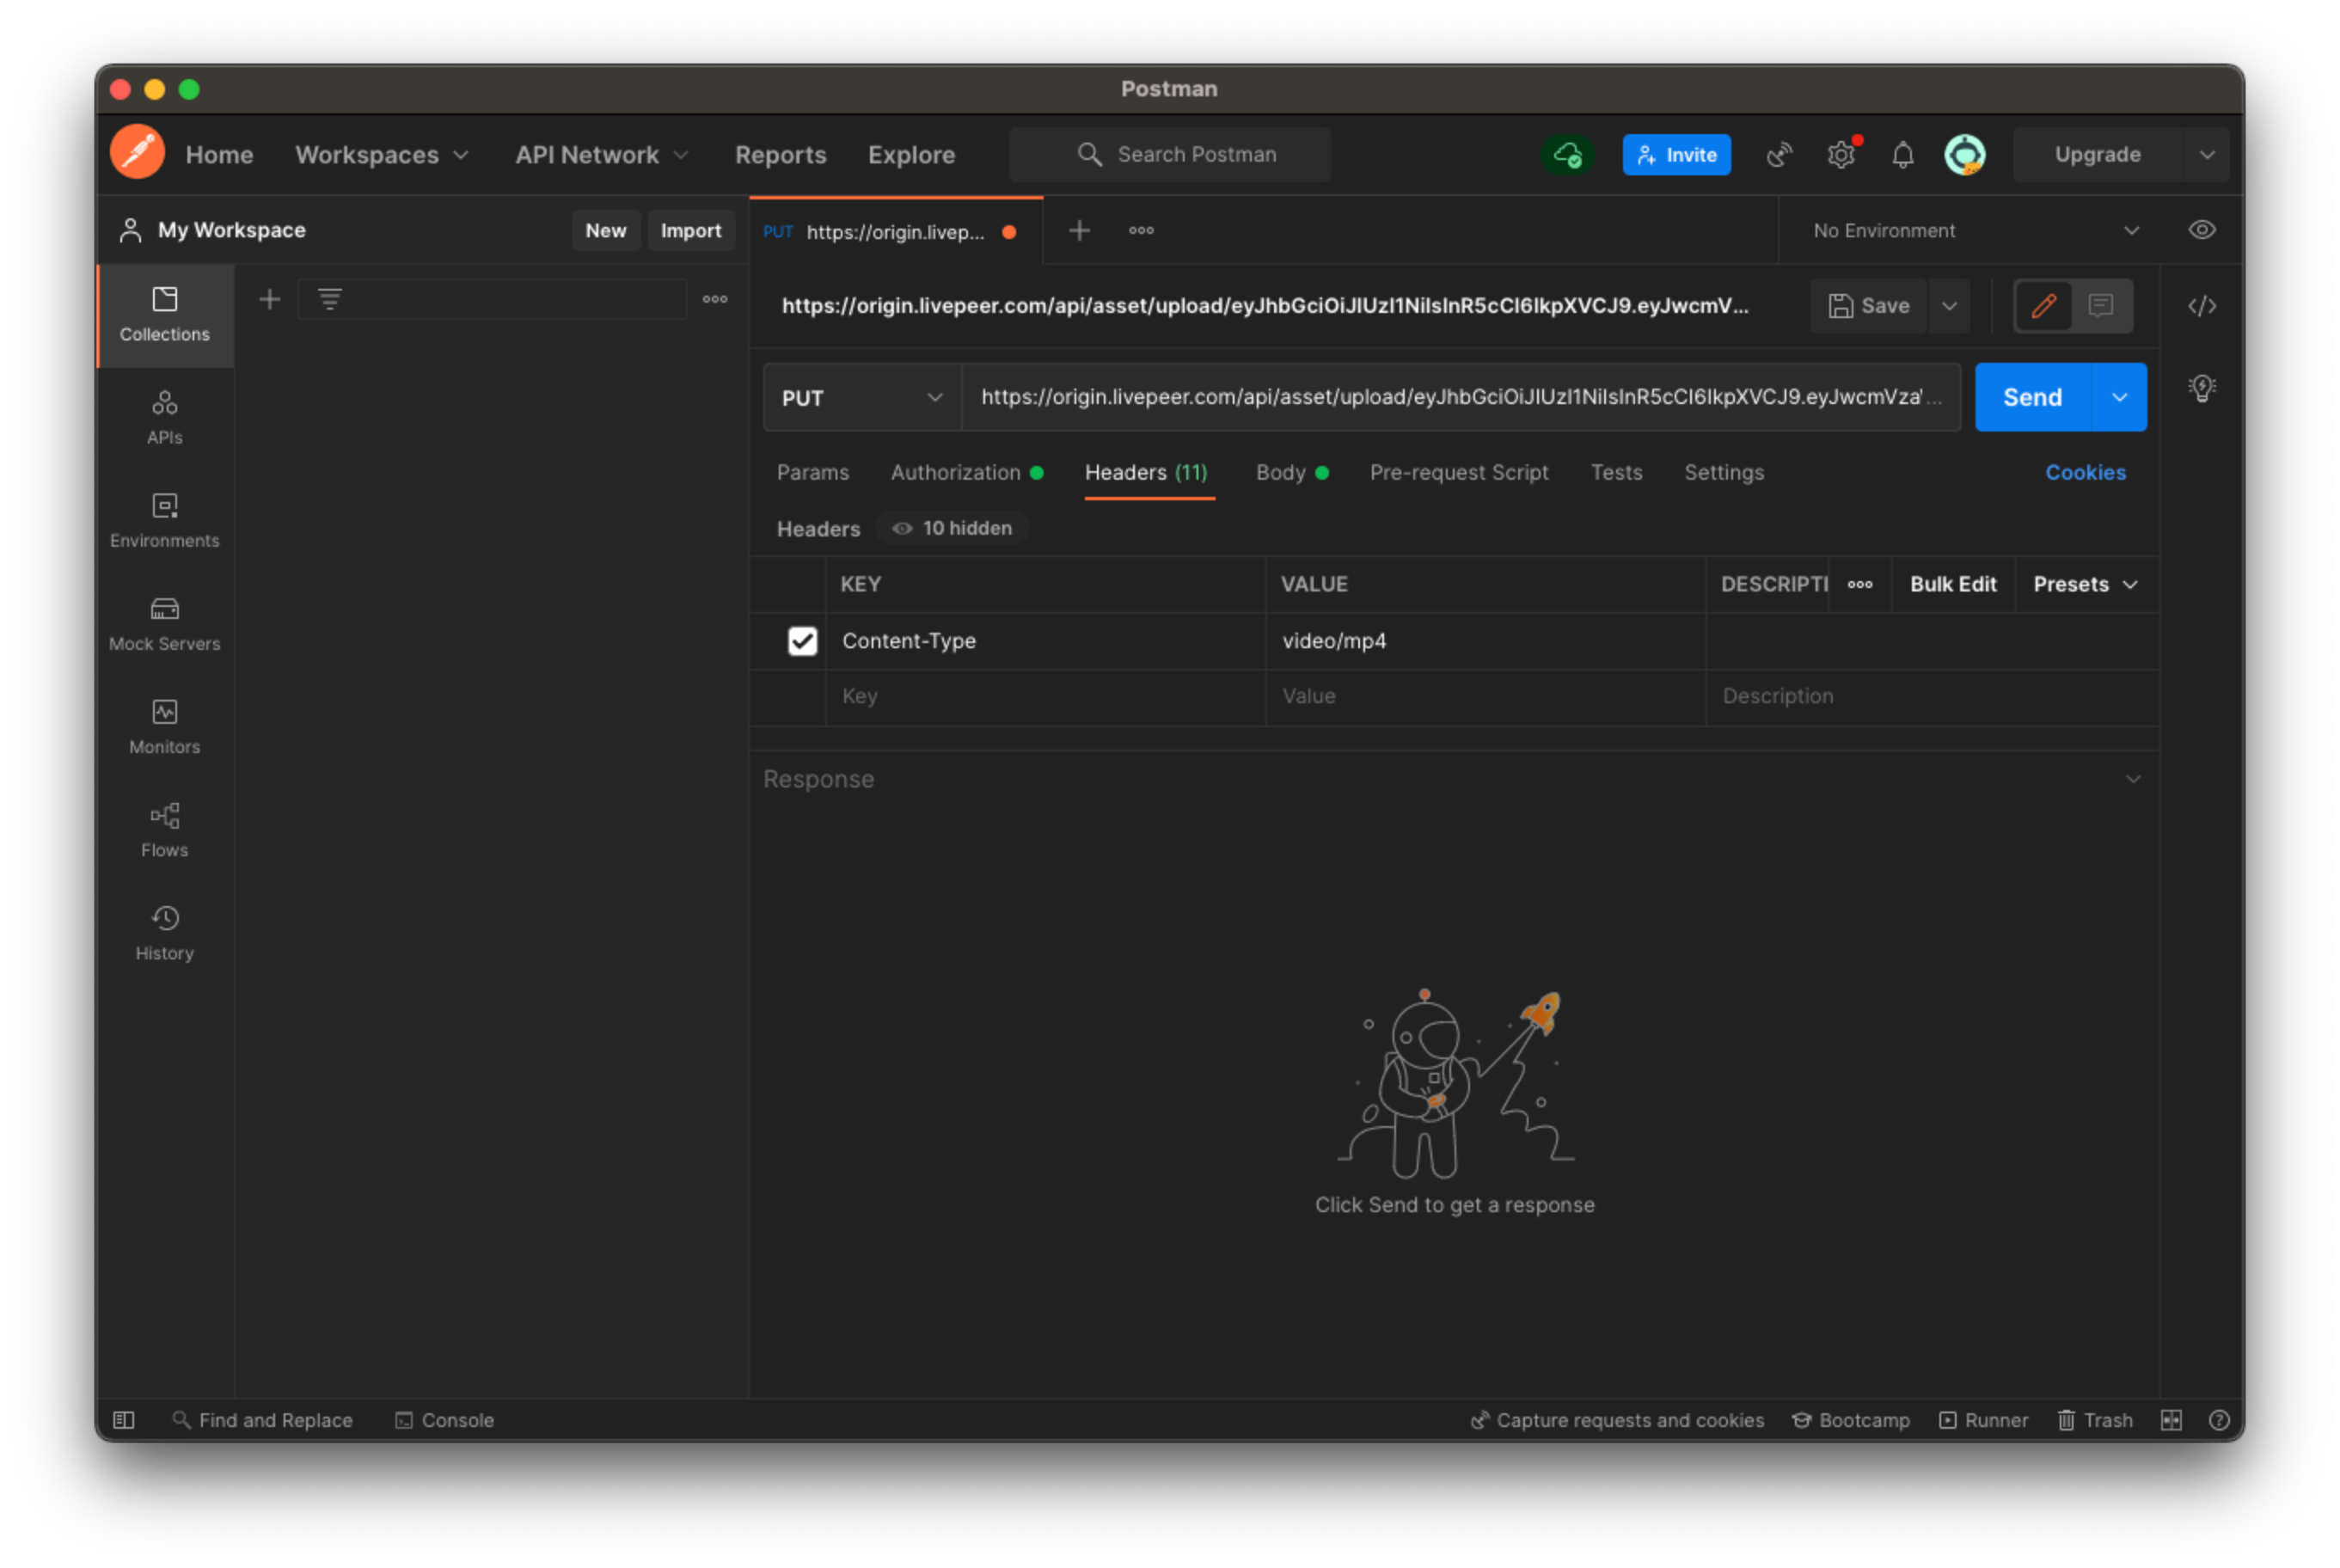
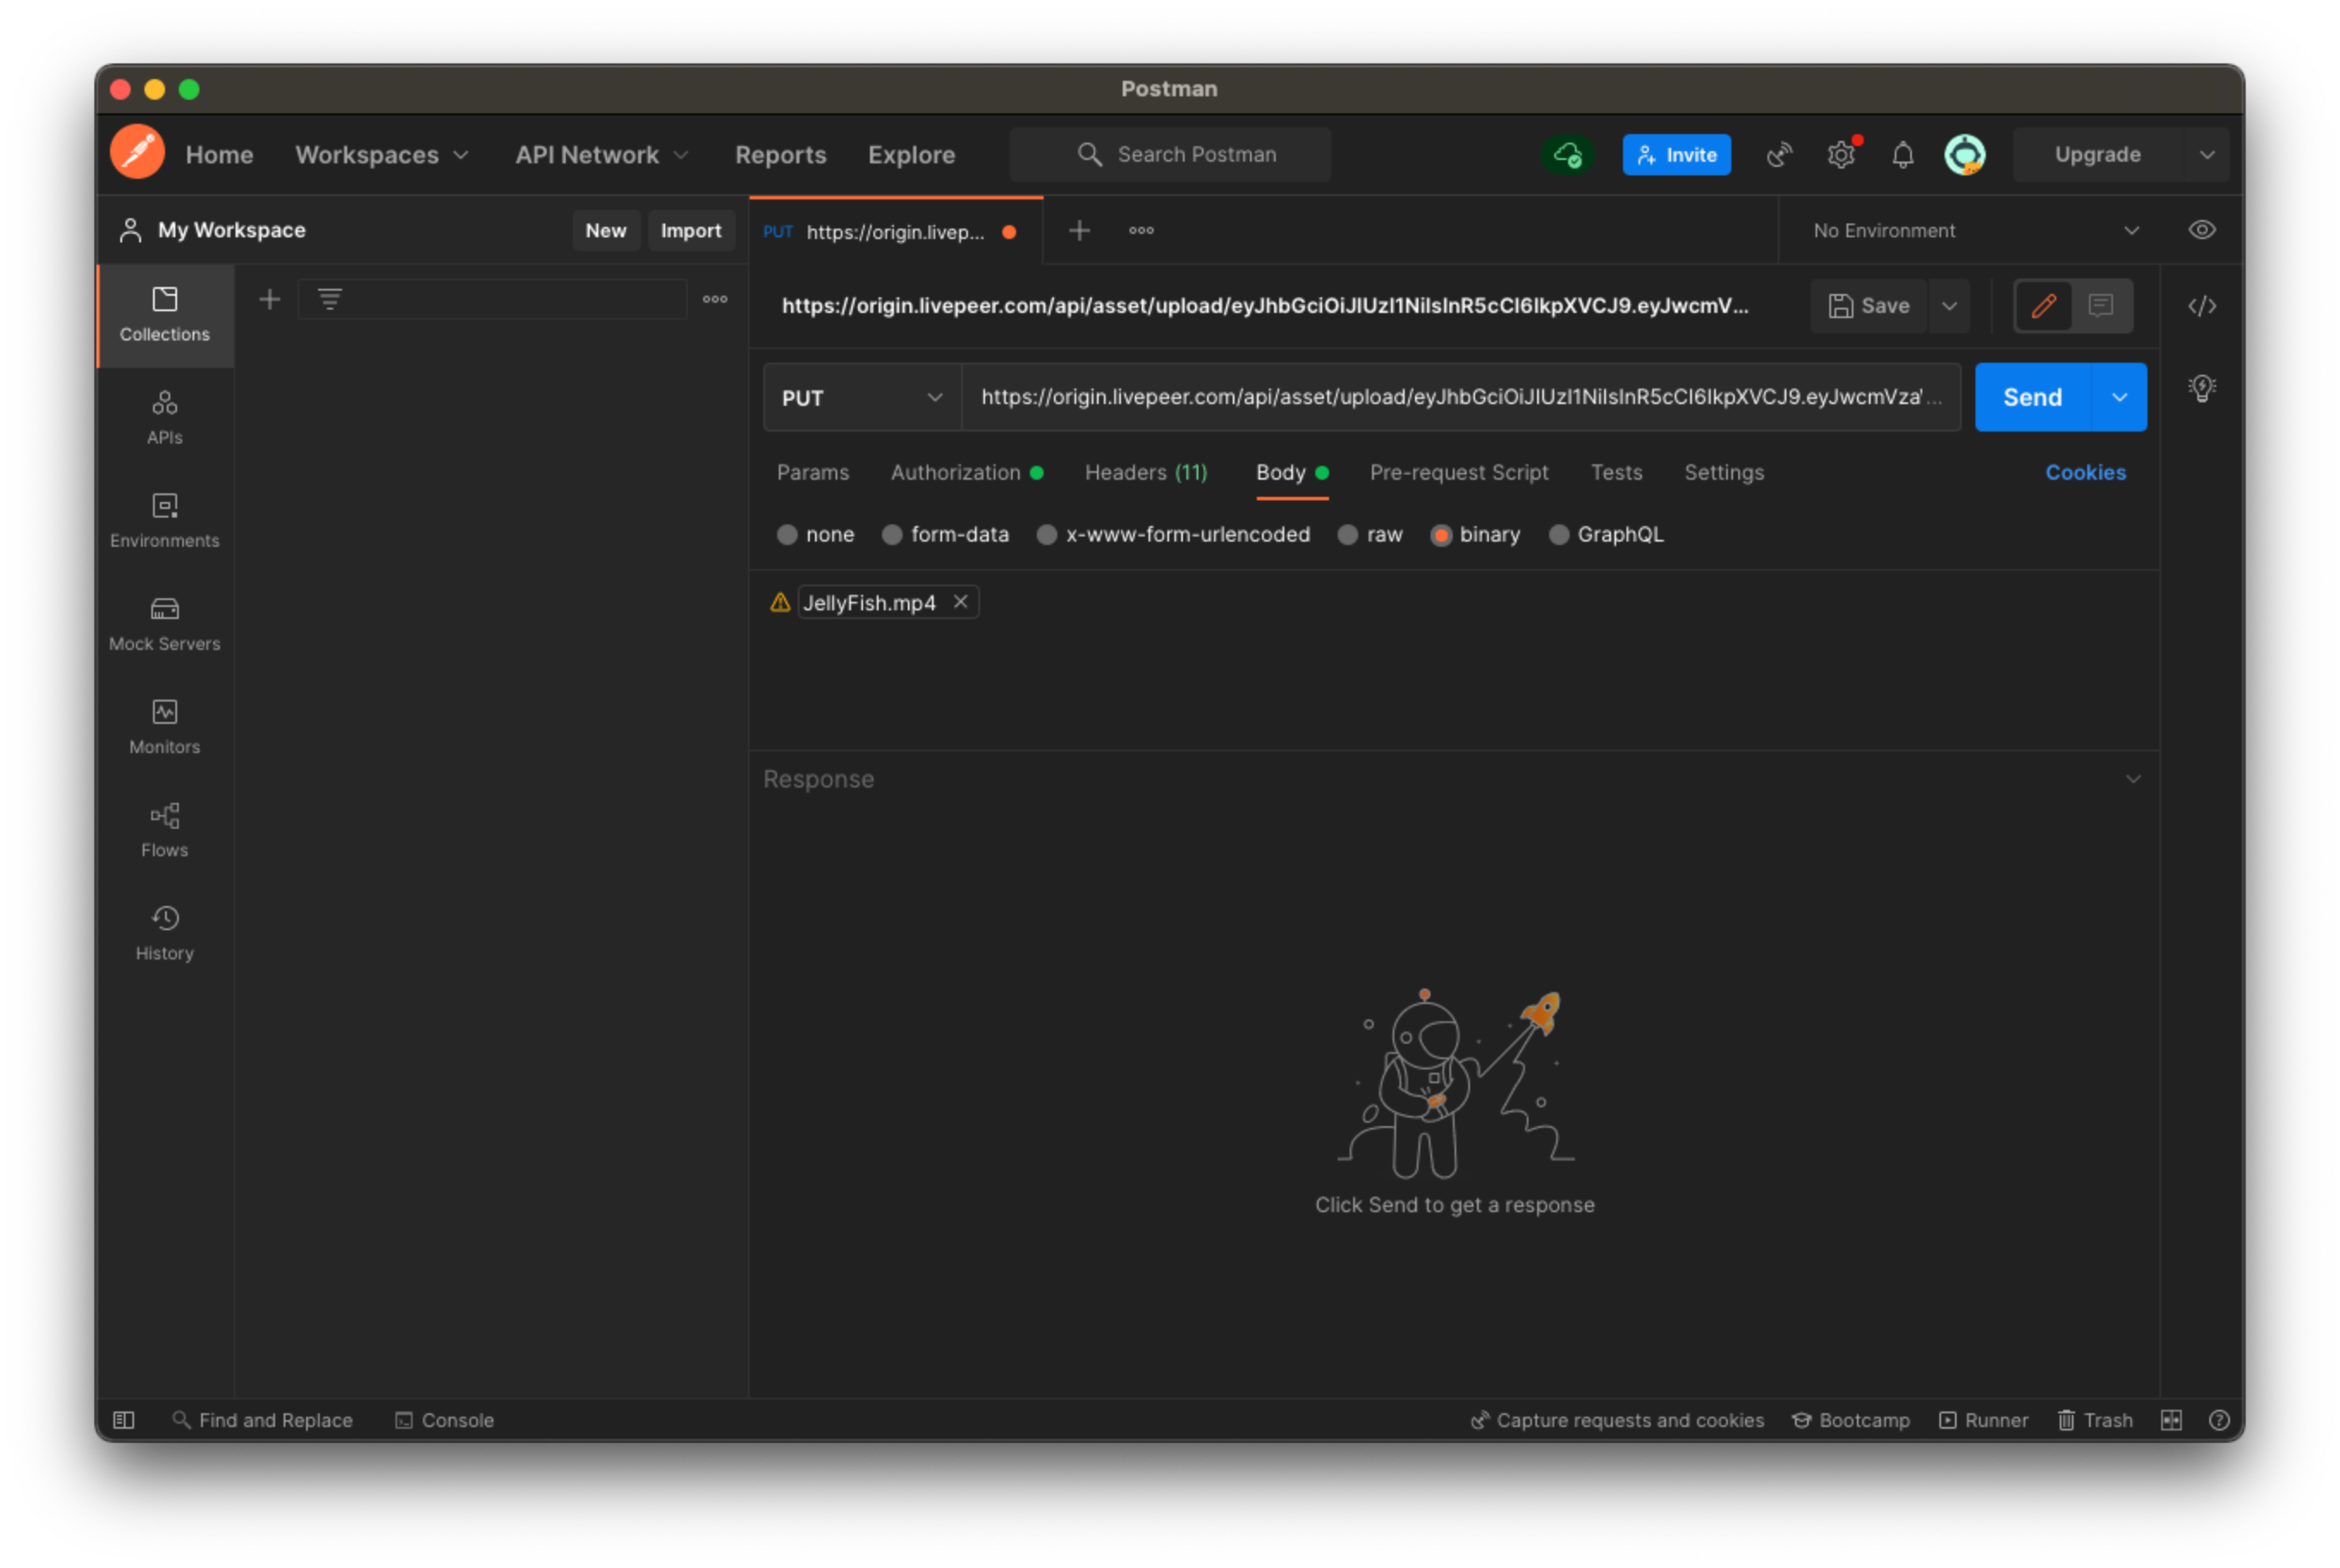
- Under the body tab, select the binary radio button
- Then select the video file you want to upload
*Notice that we only support mp4 files encoded with H264 video and AAC audio for now. If you are unsure about these, try sending the file anyway and check any returned errors!
- Click the code icon < > on the right side menu to confirm the format is the same as the cURL example in the API reference
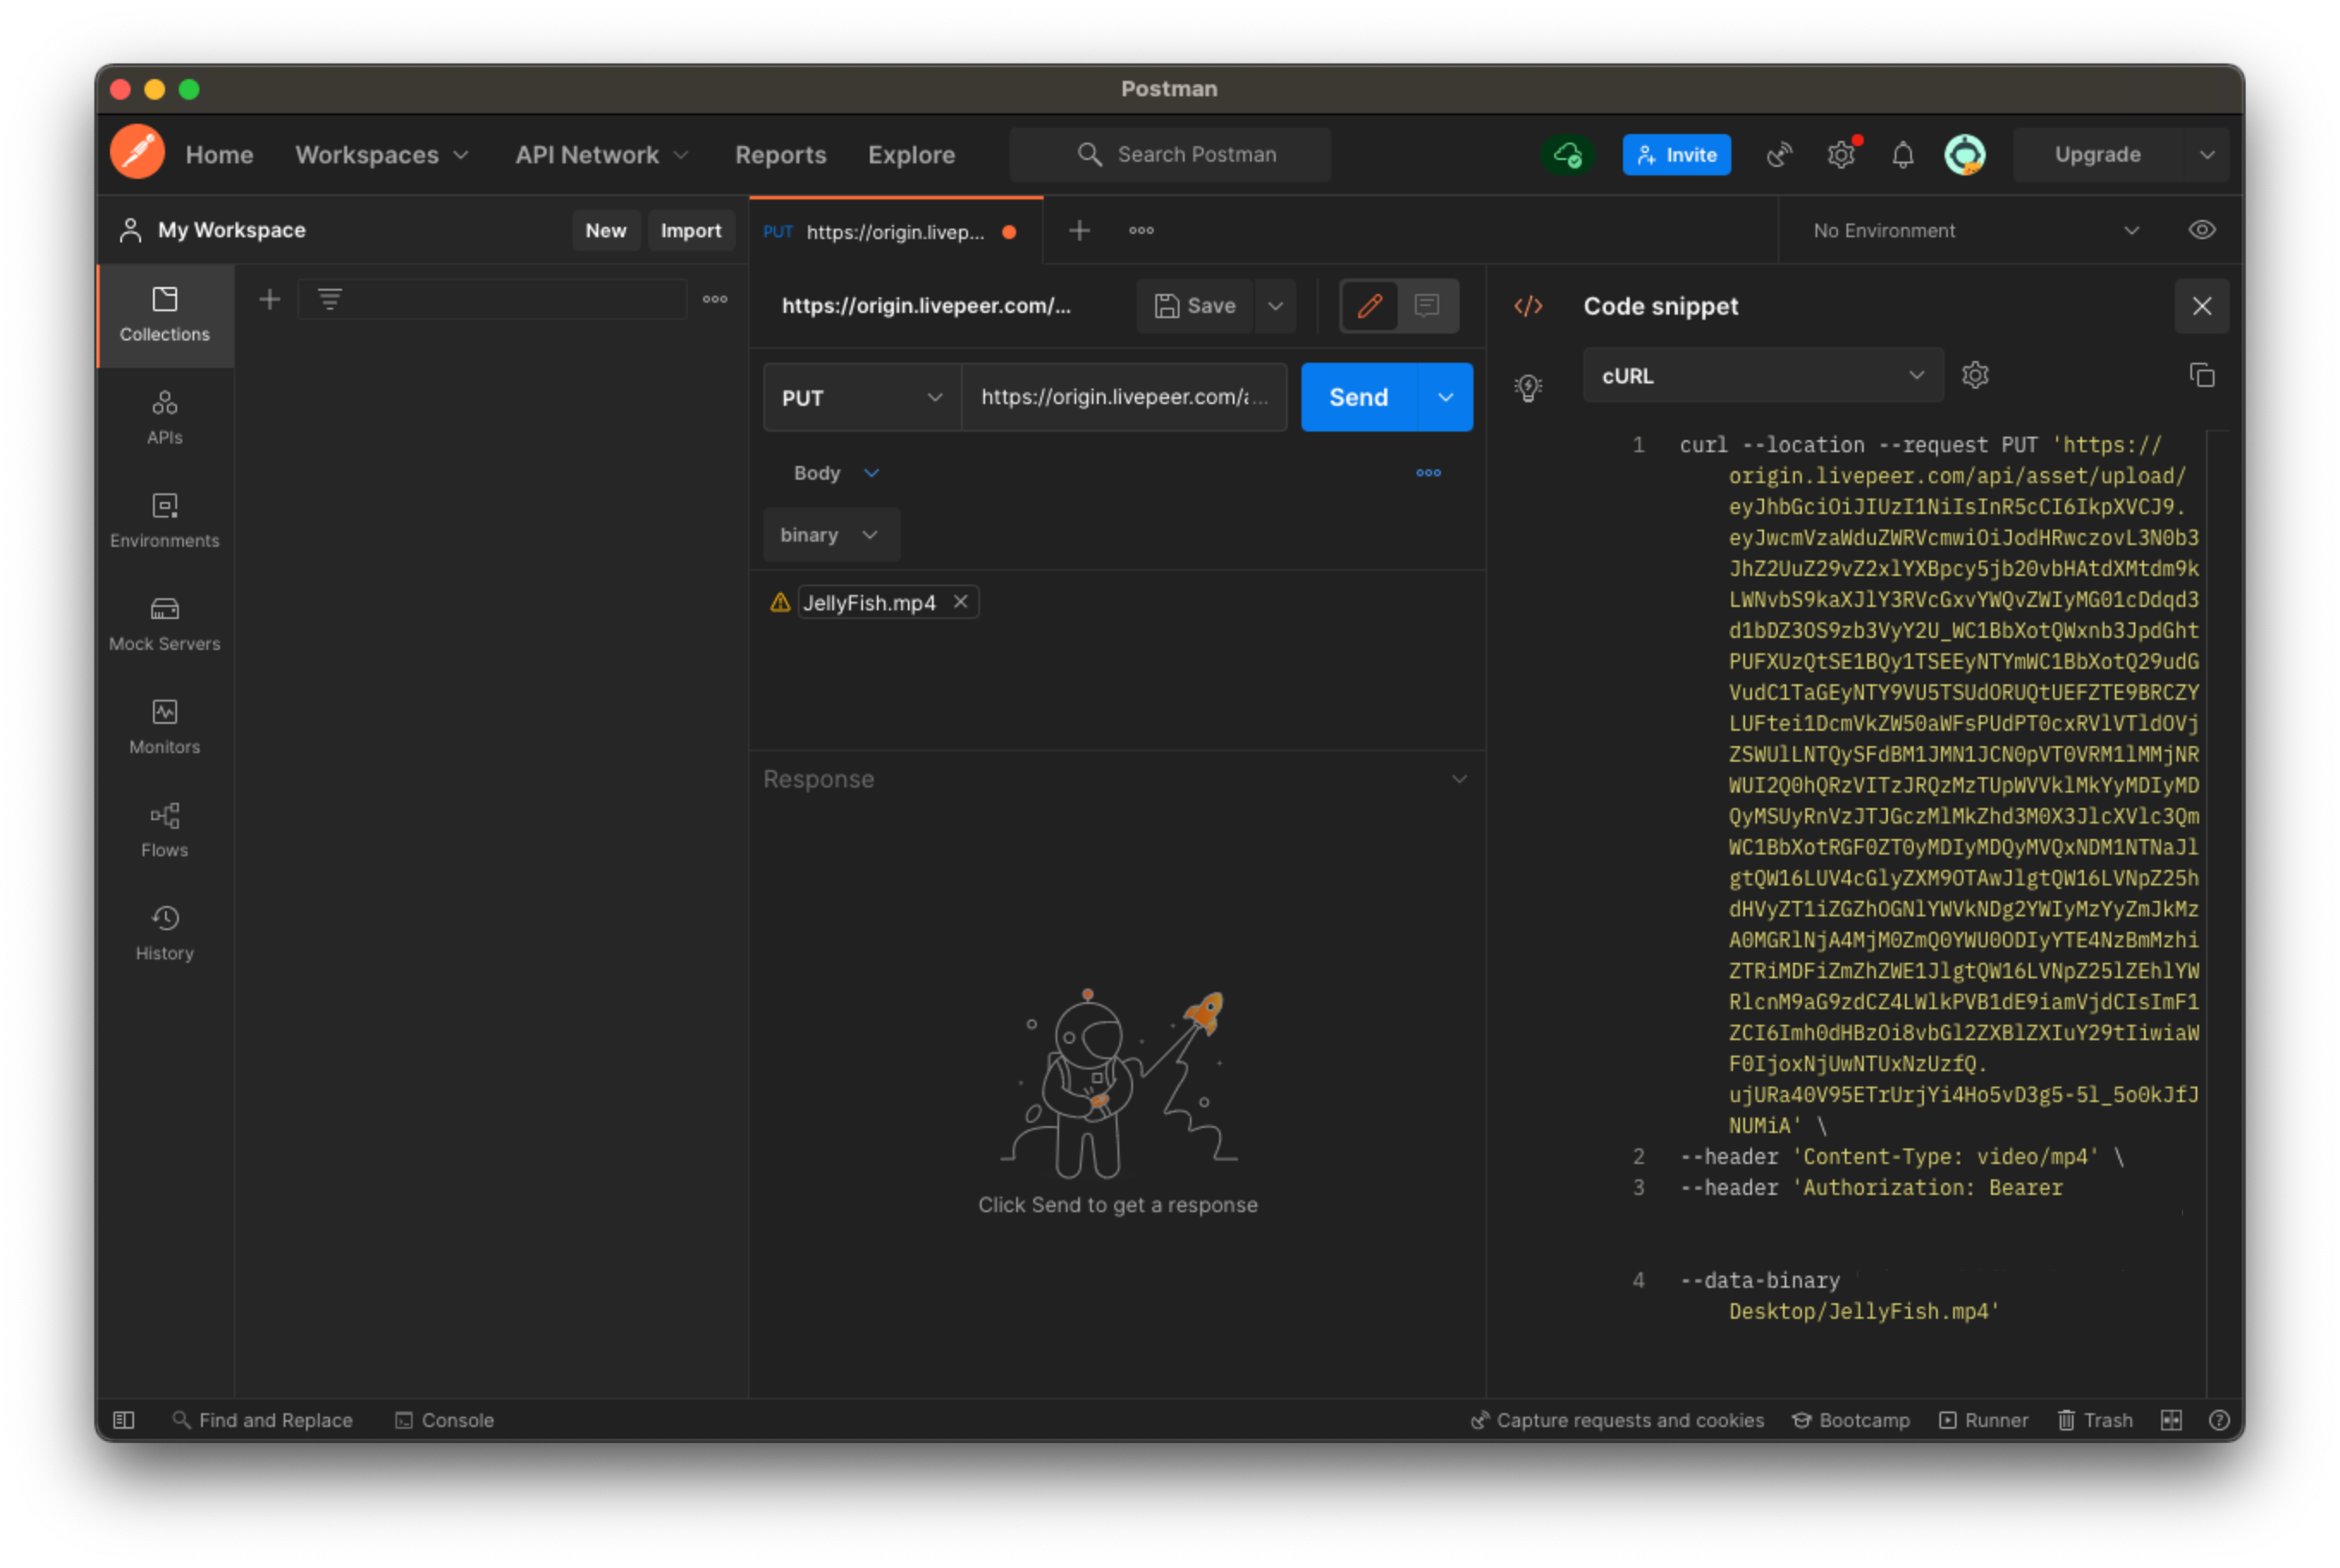
- Click the blue send button and you should get back a 200 status with the response including the parameters of the stream
Step 2: Retrieve an asset
We need to check to make sure that the asset is ready before exporting it since it can take some time to upload.
For the asset ID here, use the asset.id field in the response to the Import or Request Upload requests above.
- Retrieve an individual asset, select GET option, and then paste in Livepeer’s URL for retrieving an asset
https://livepeer.com/api/asset/:assetId- In the params tab, paste in the asset ID in the Value column associated with the Key: assetId
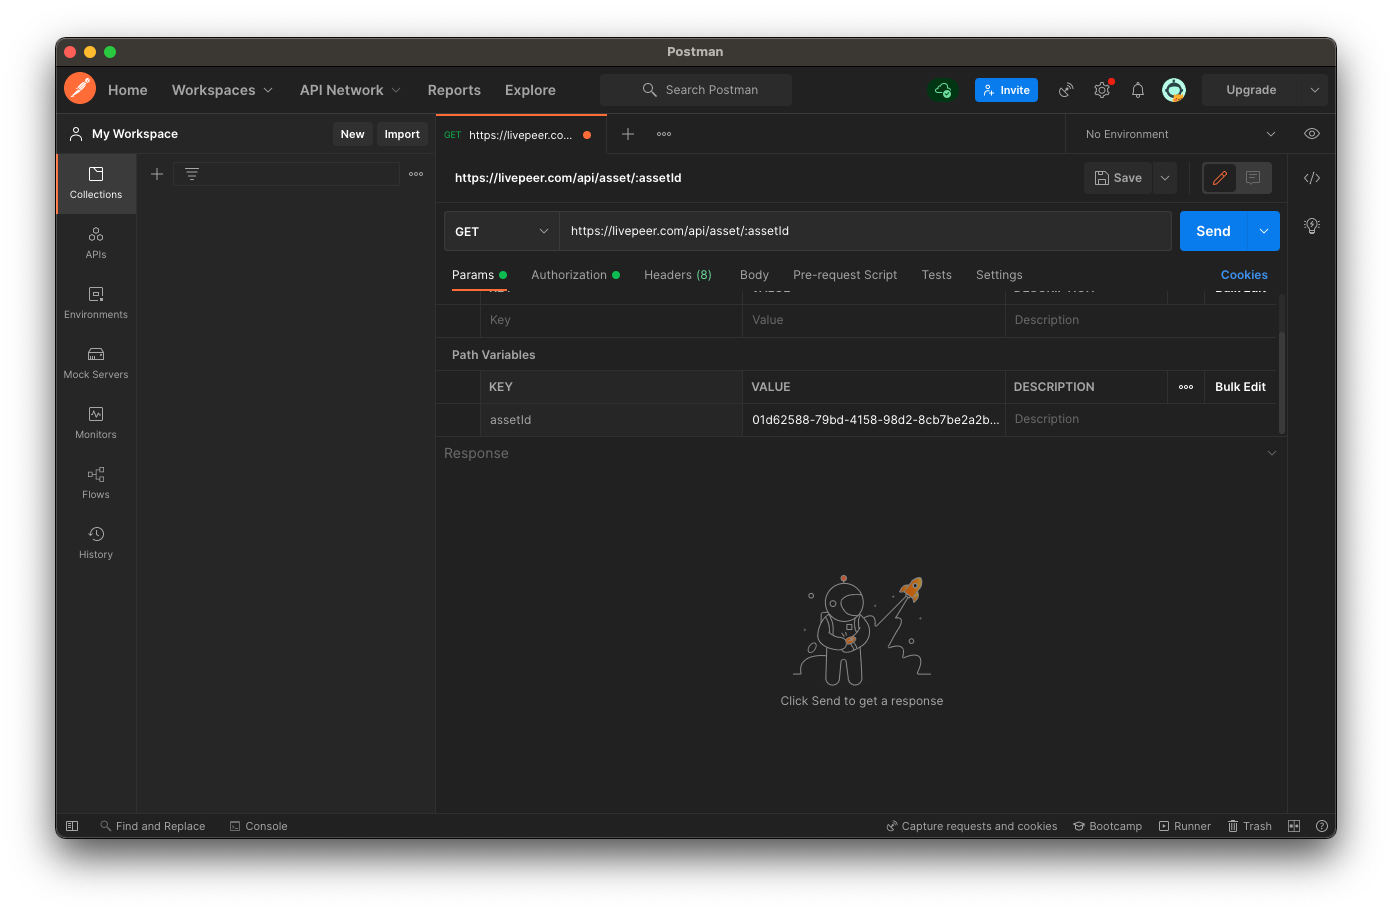
- Make sure the Body tag has the none radio button selected
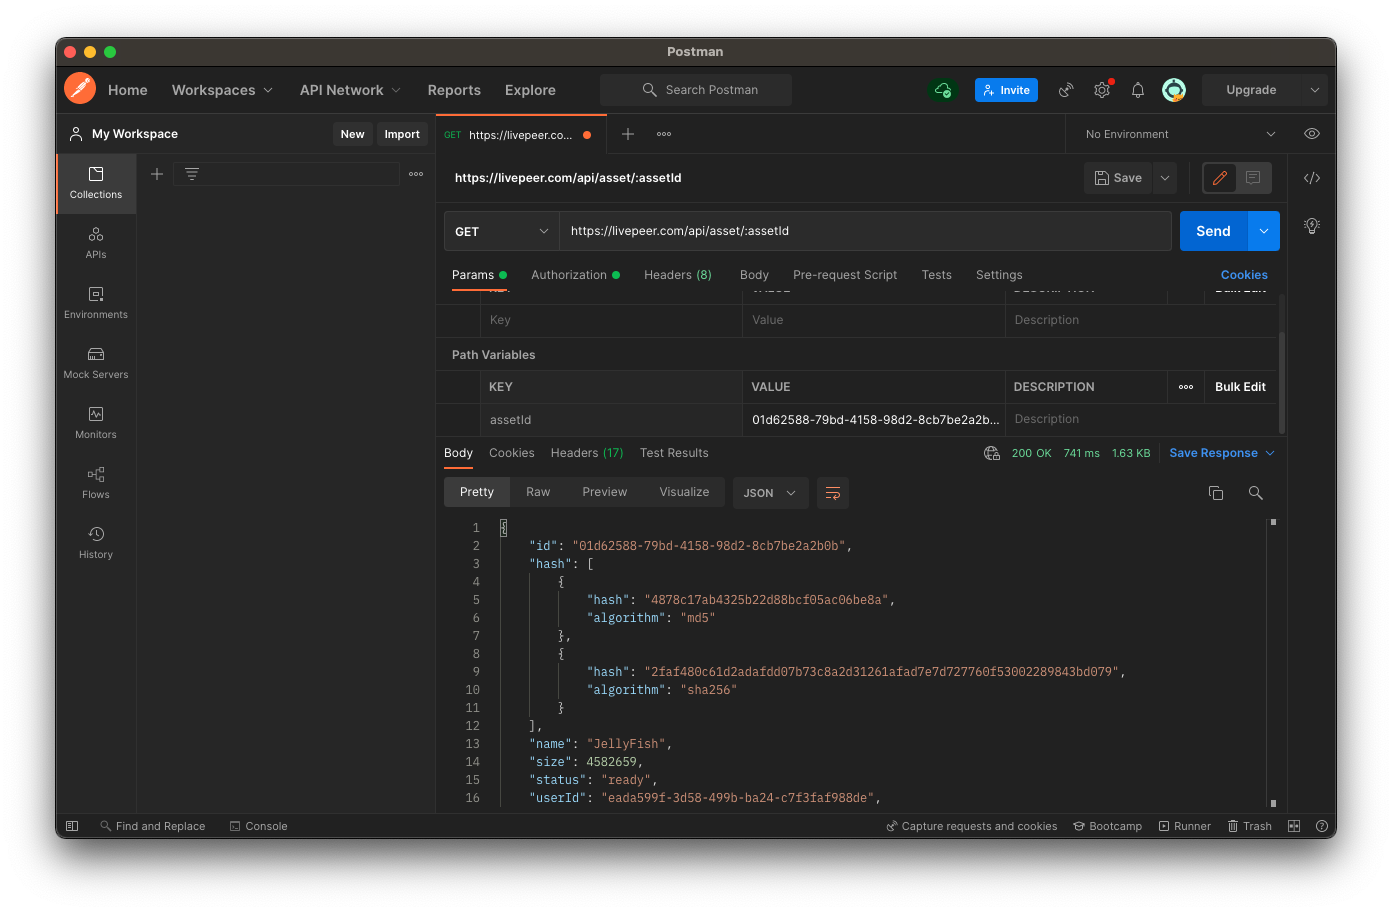
- Click the blue send button and you should get back a 200 status with the response including a list of the assets
- Look for the status in the response body, it should return
status:“ready”. If it isstatus:“waiting”, then wait a little longer and repeat this step until the status is ready before moving to the exporting step.
Step 3: Export to IPFS
- Select the POST option and paste in Livepeer’s URL for exporting an asset to IPFS
https://livepeer.com/api/asset/$ASSET_ID/export*The $ASSET_ID is located in the response body from step 1A or 1B depending on the method you chose.
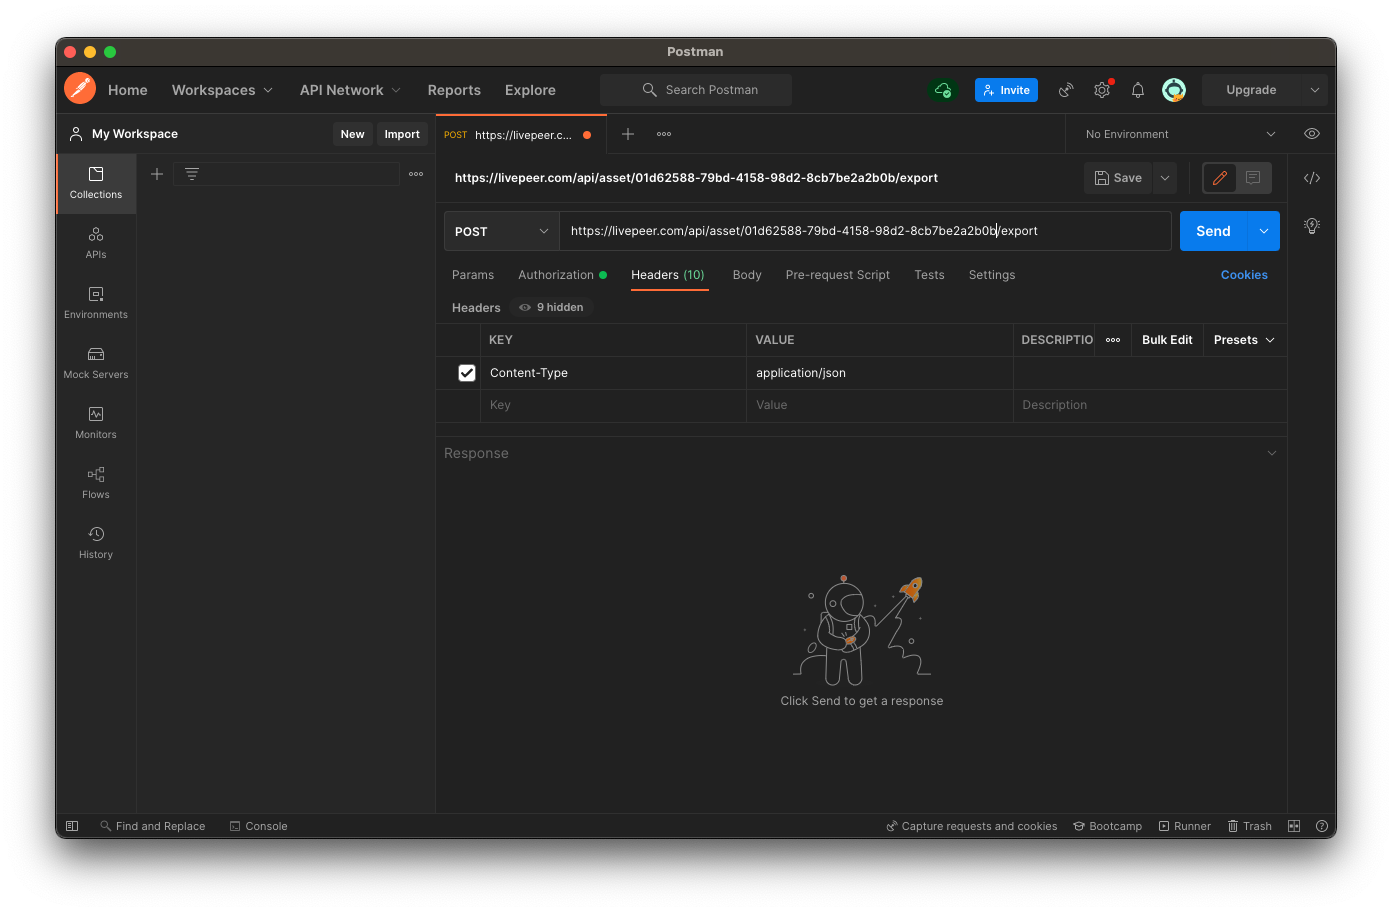
- Make sure the Body tag has the raw radio button selected and the JSON format is selected from the drop-down menu on the right
- In the text box field below, paste the following code from the Livepeer’s VoD API Reference
{ “ipfs”: { } }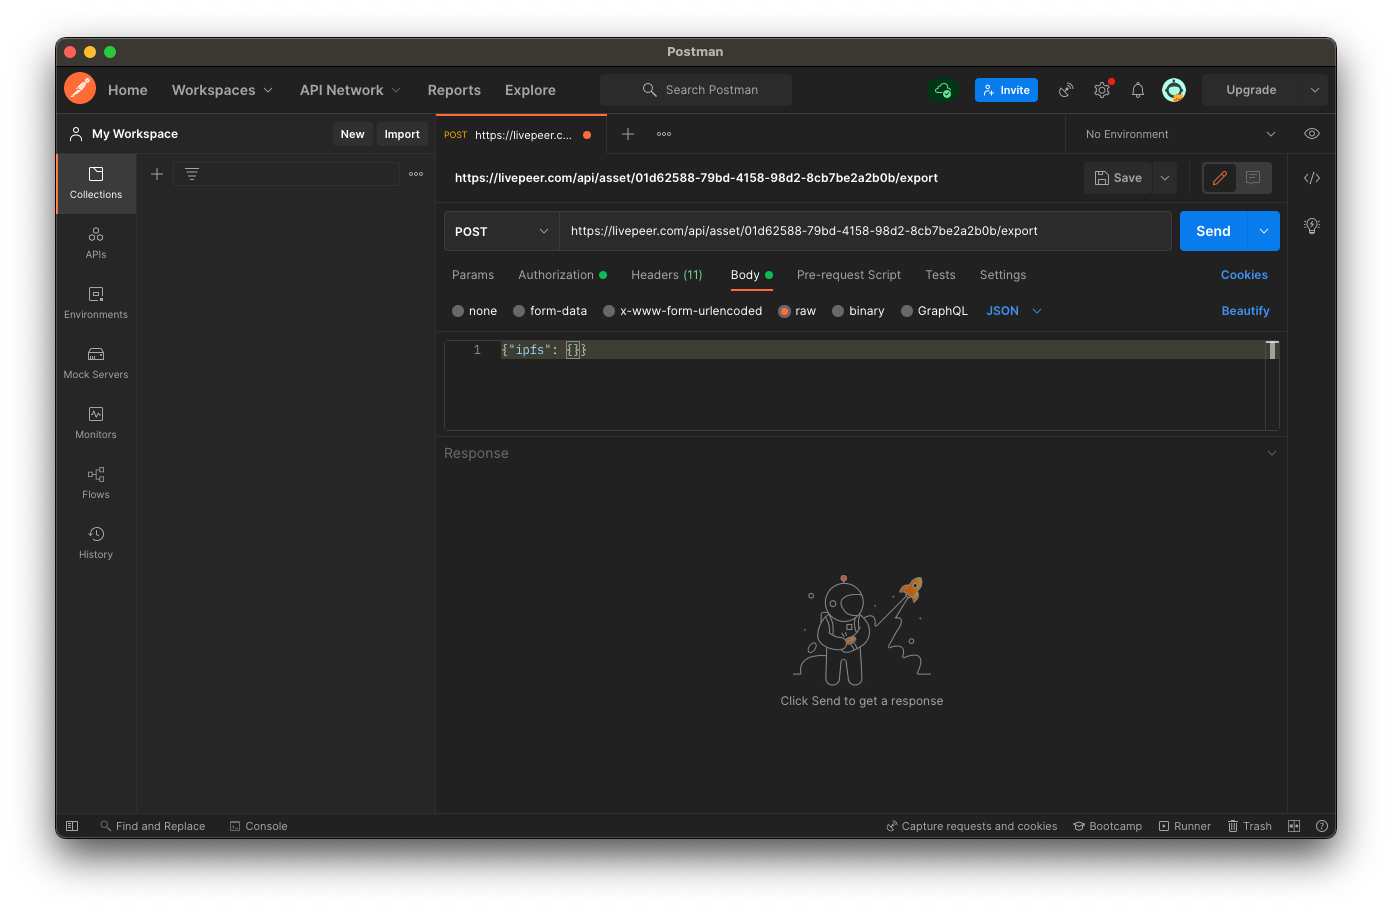
- Click the code icon < > on the right side menu to confirm the format is the same as the cURL example in the API reference
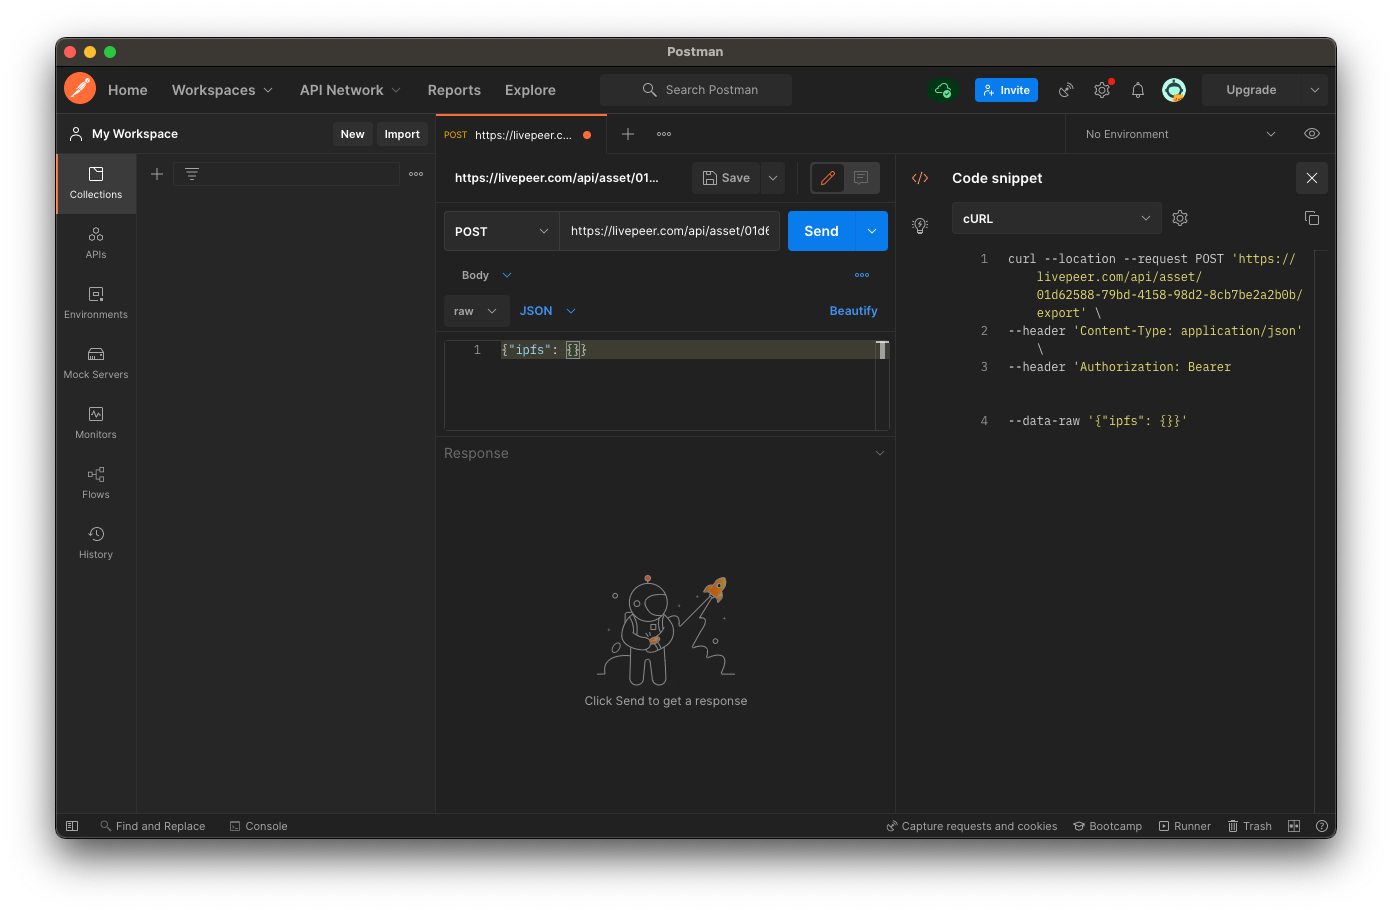
- Click the blue send button and you should get back a 201 status with the response showing the task has been created with the type export
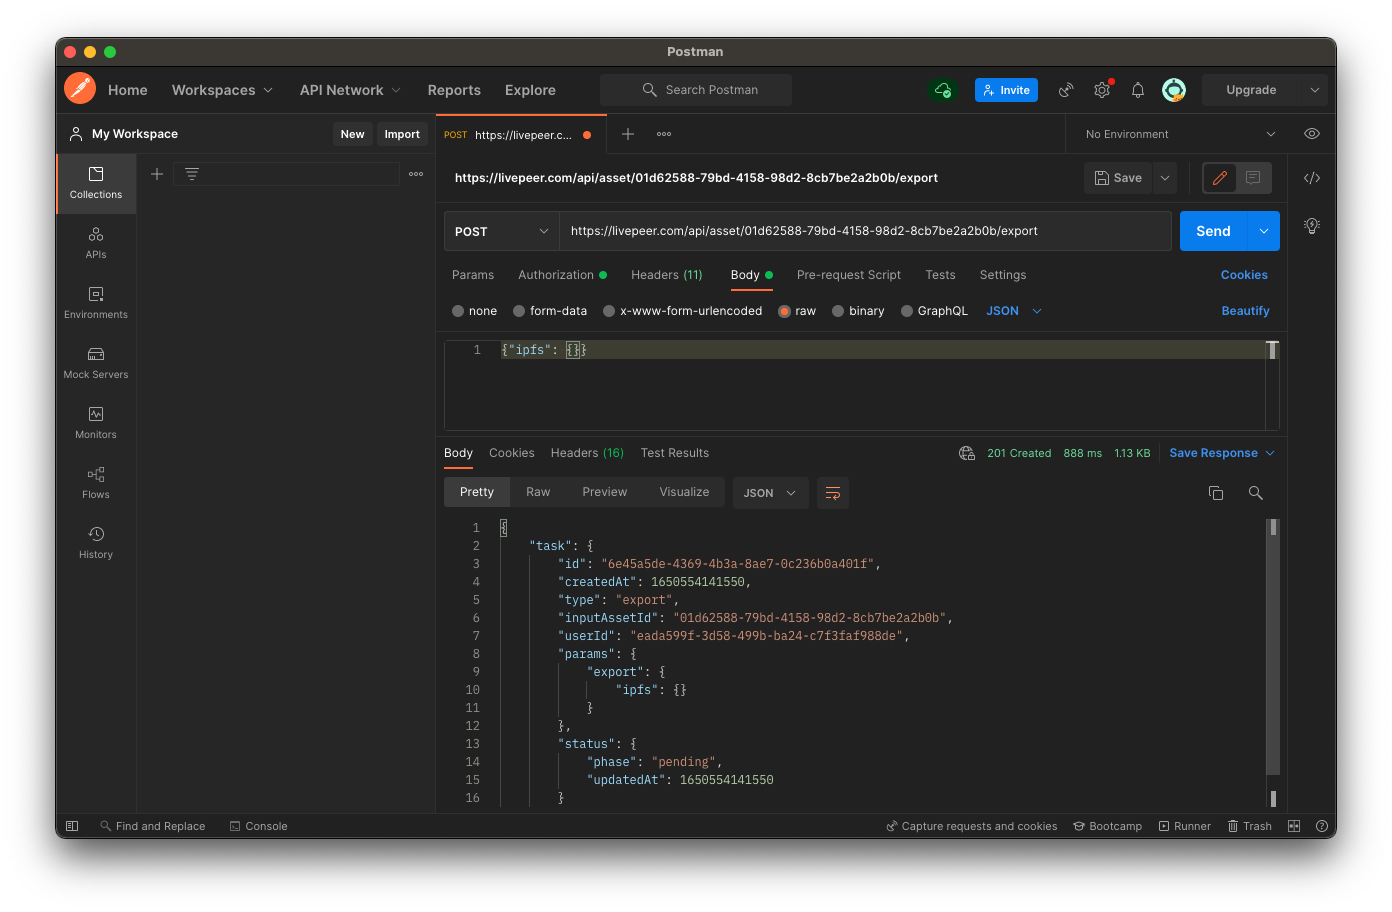
*IPFS is a complex protocol and so the export task can take a while. Expect this to take a bit longer than the import task
*Copy the ID of the task from the response for the next part.
Step 4 Retrieve a task
For the task ID here, use the task.id field in the response of the Export request above.
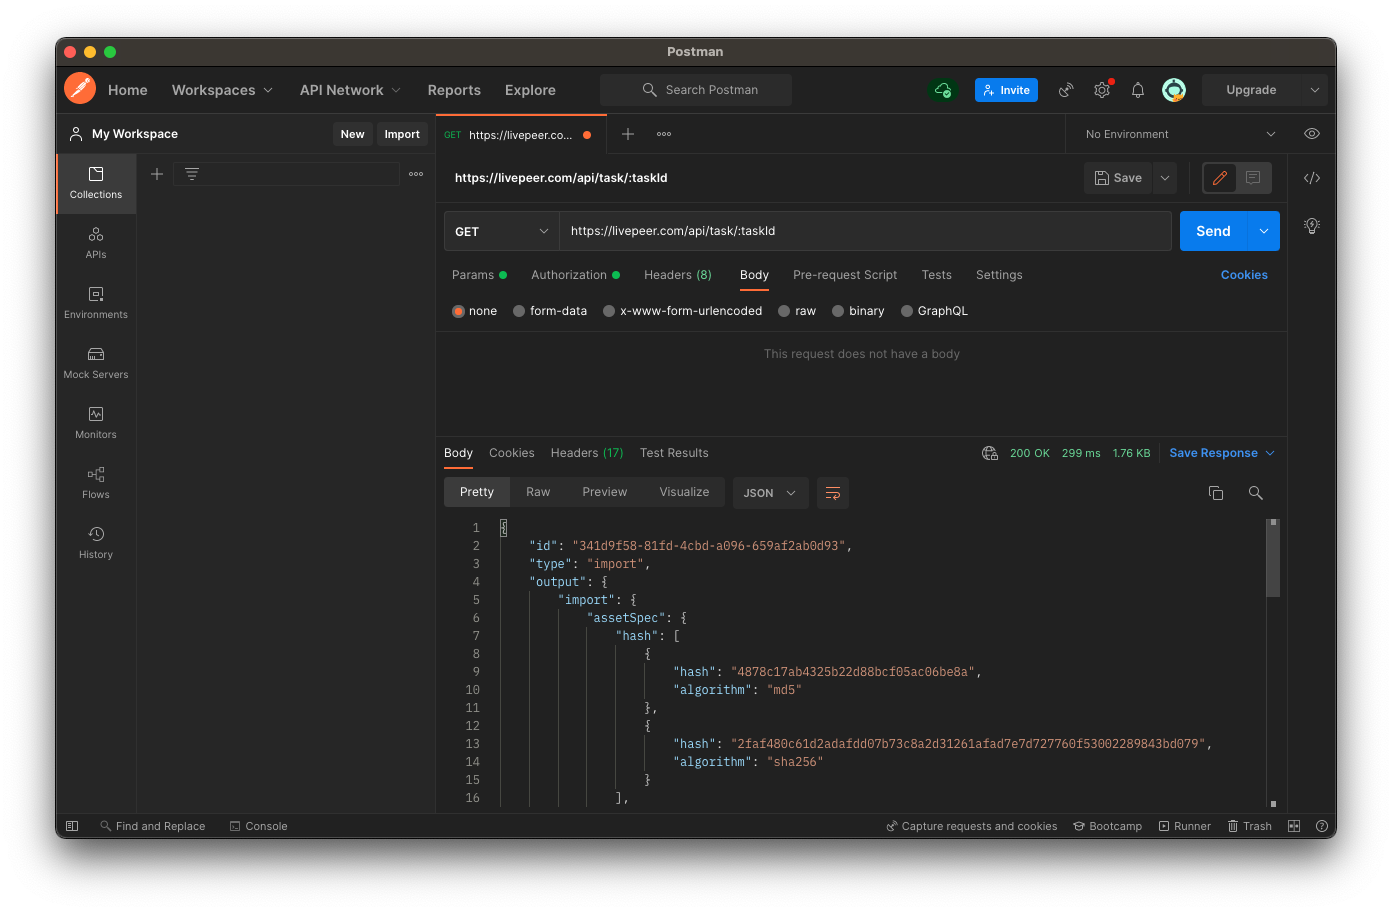
- Select the GET option and paste in Livepeer’s URL for retrieving a specific task with the task id
https://livepeer.com/api/task/:taskId- In the params tab, paste in the task ID in the Value column associated with the Key: taskId
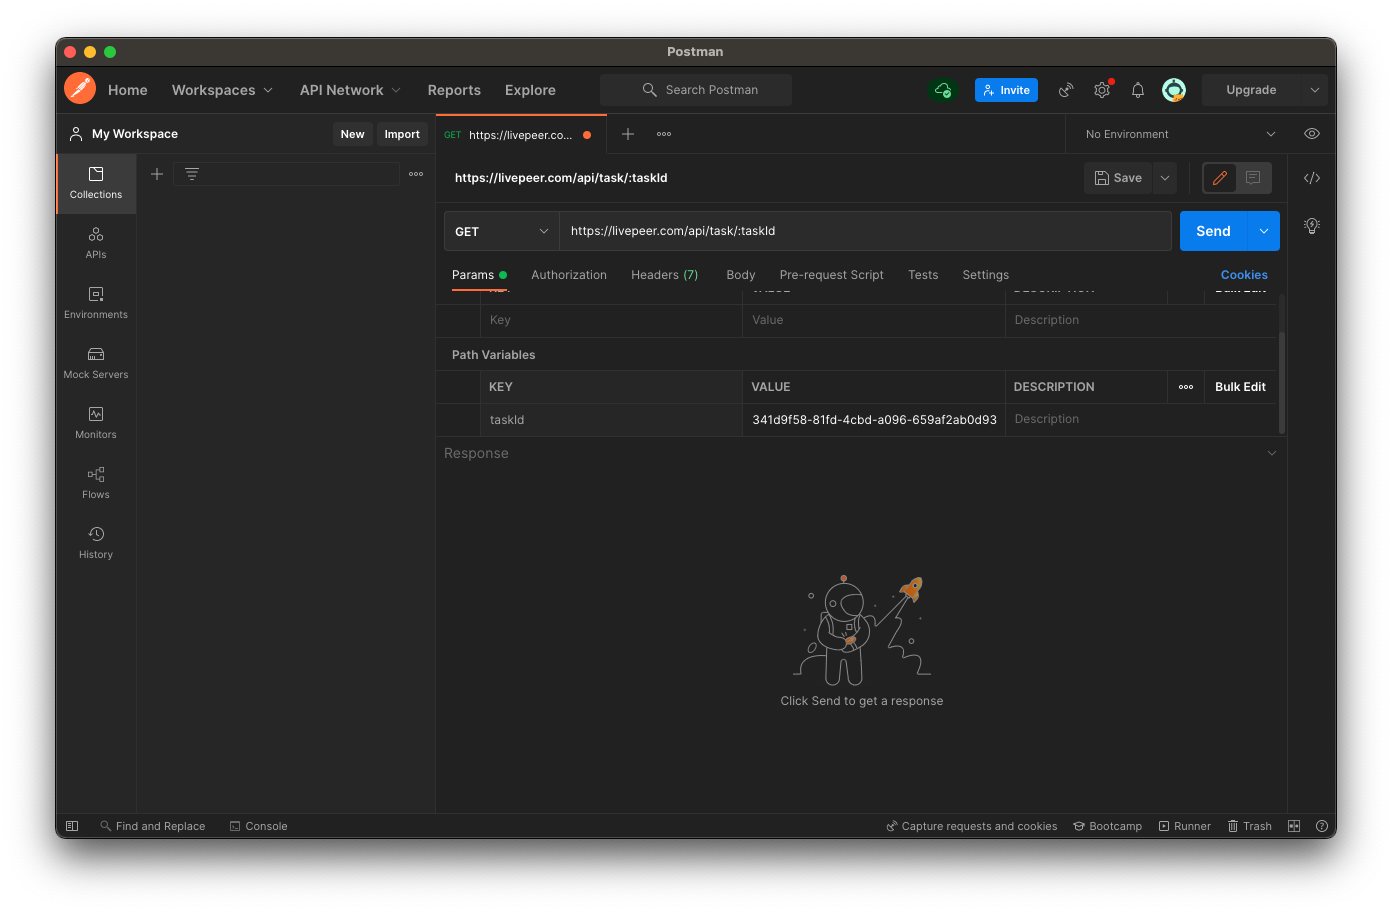
- Make sure the Body tag has the none radio button selected
- Click the blue send button and you should get back a 200 status with the response including the specific task requested
Getting the CID
IPFS locates the content based on what is inside of it rather than by the location, CID is what allows it to do this.
To Get the CID and metadata URL for the asset that was just exported, you can get it by retrieving the task above until it is finished (check the status field in the response). That finished task will have an output with all the information about that asset, and the CID information is located under the output.export.ipfs path. See the image below:
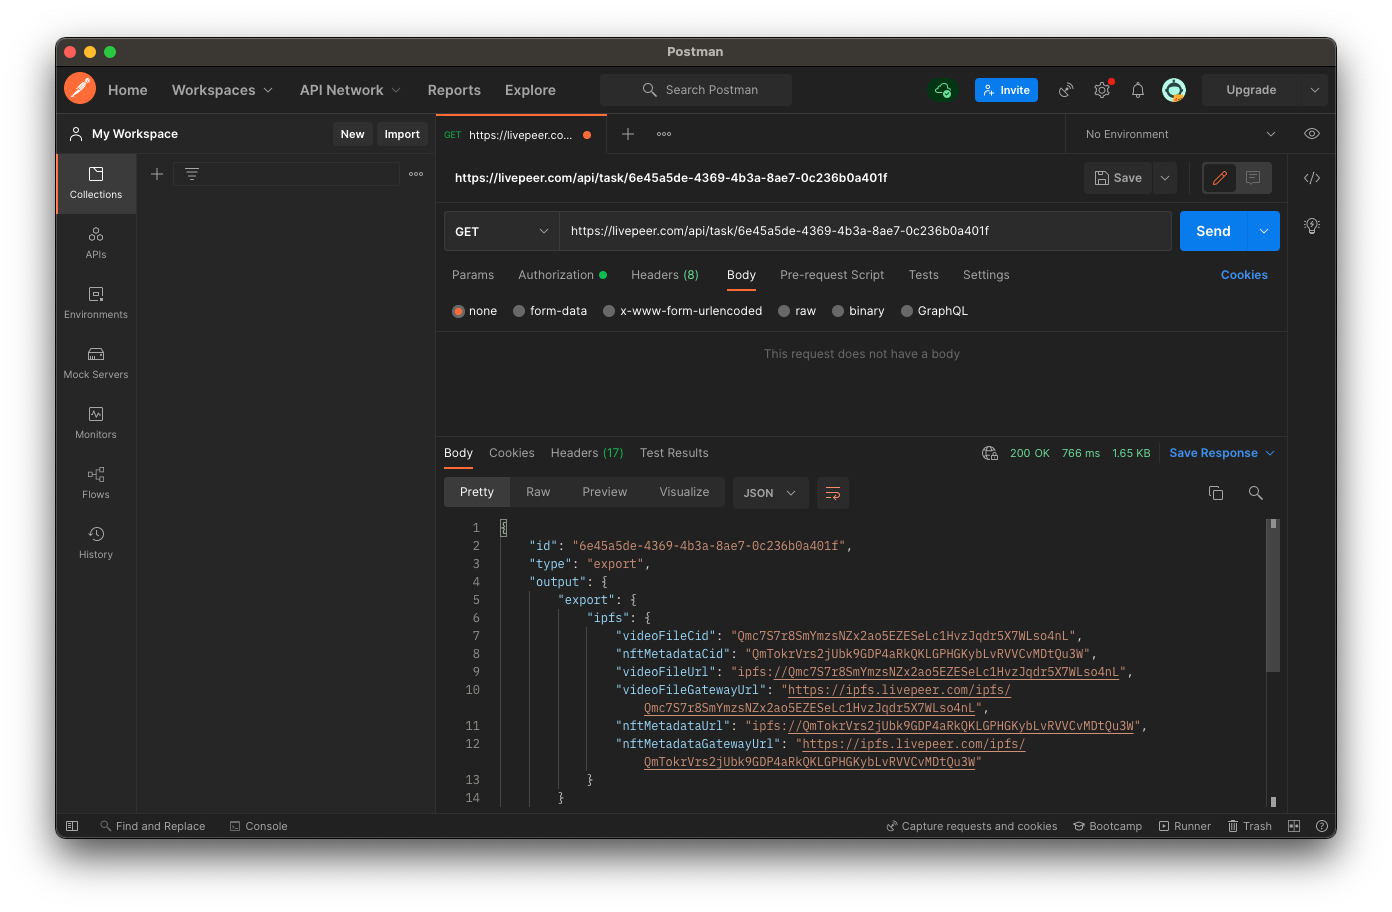
As you can see here, information such as the video file’s CID, location of the URL on IPFS, and other metadata information.
Conclusion
With the ability to upload assets and export them to IPFS easily with Livepeer Video Services’ VoD API, those assets can now be stored in decentralized storage and be accessible.
Start creating your own VoD Dapps and store them in decentralized storage.
Take it to the next level by minting video NFTs using Livepeer Video Services video NFT SDK.